Creative Technology
Voltavox
2022-11-03
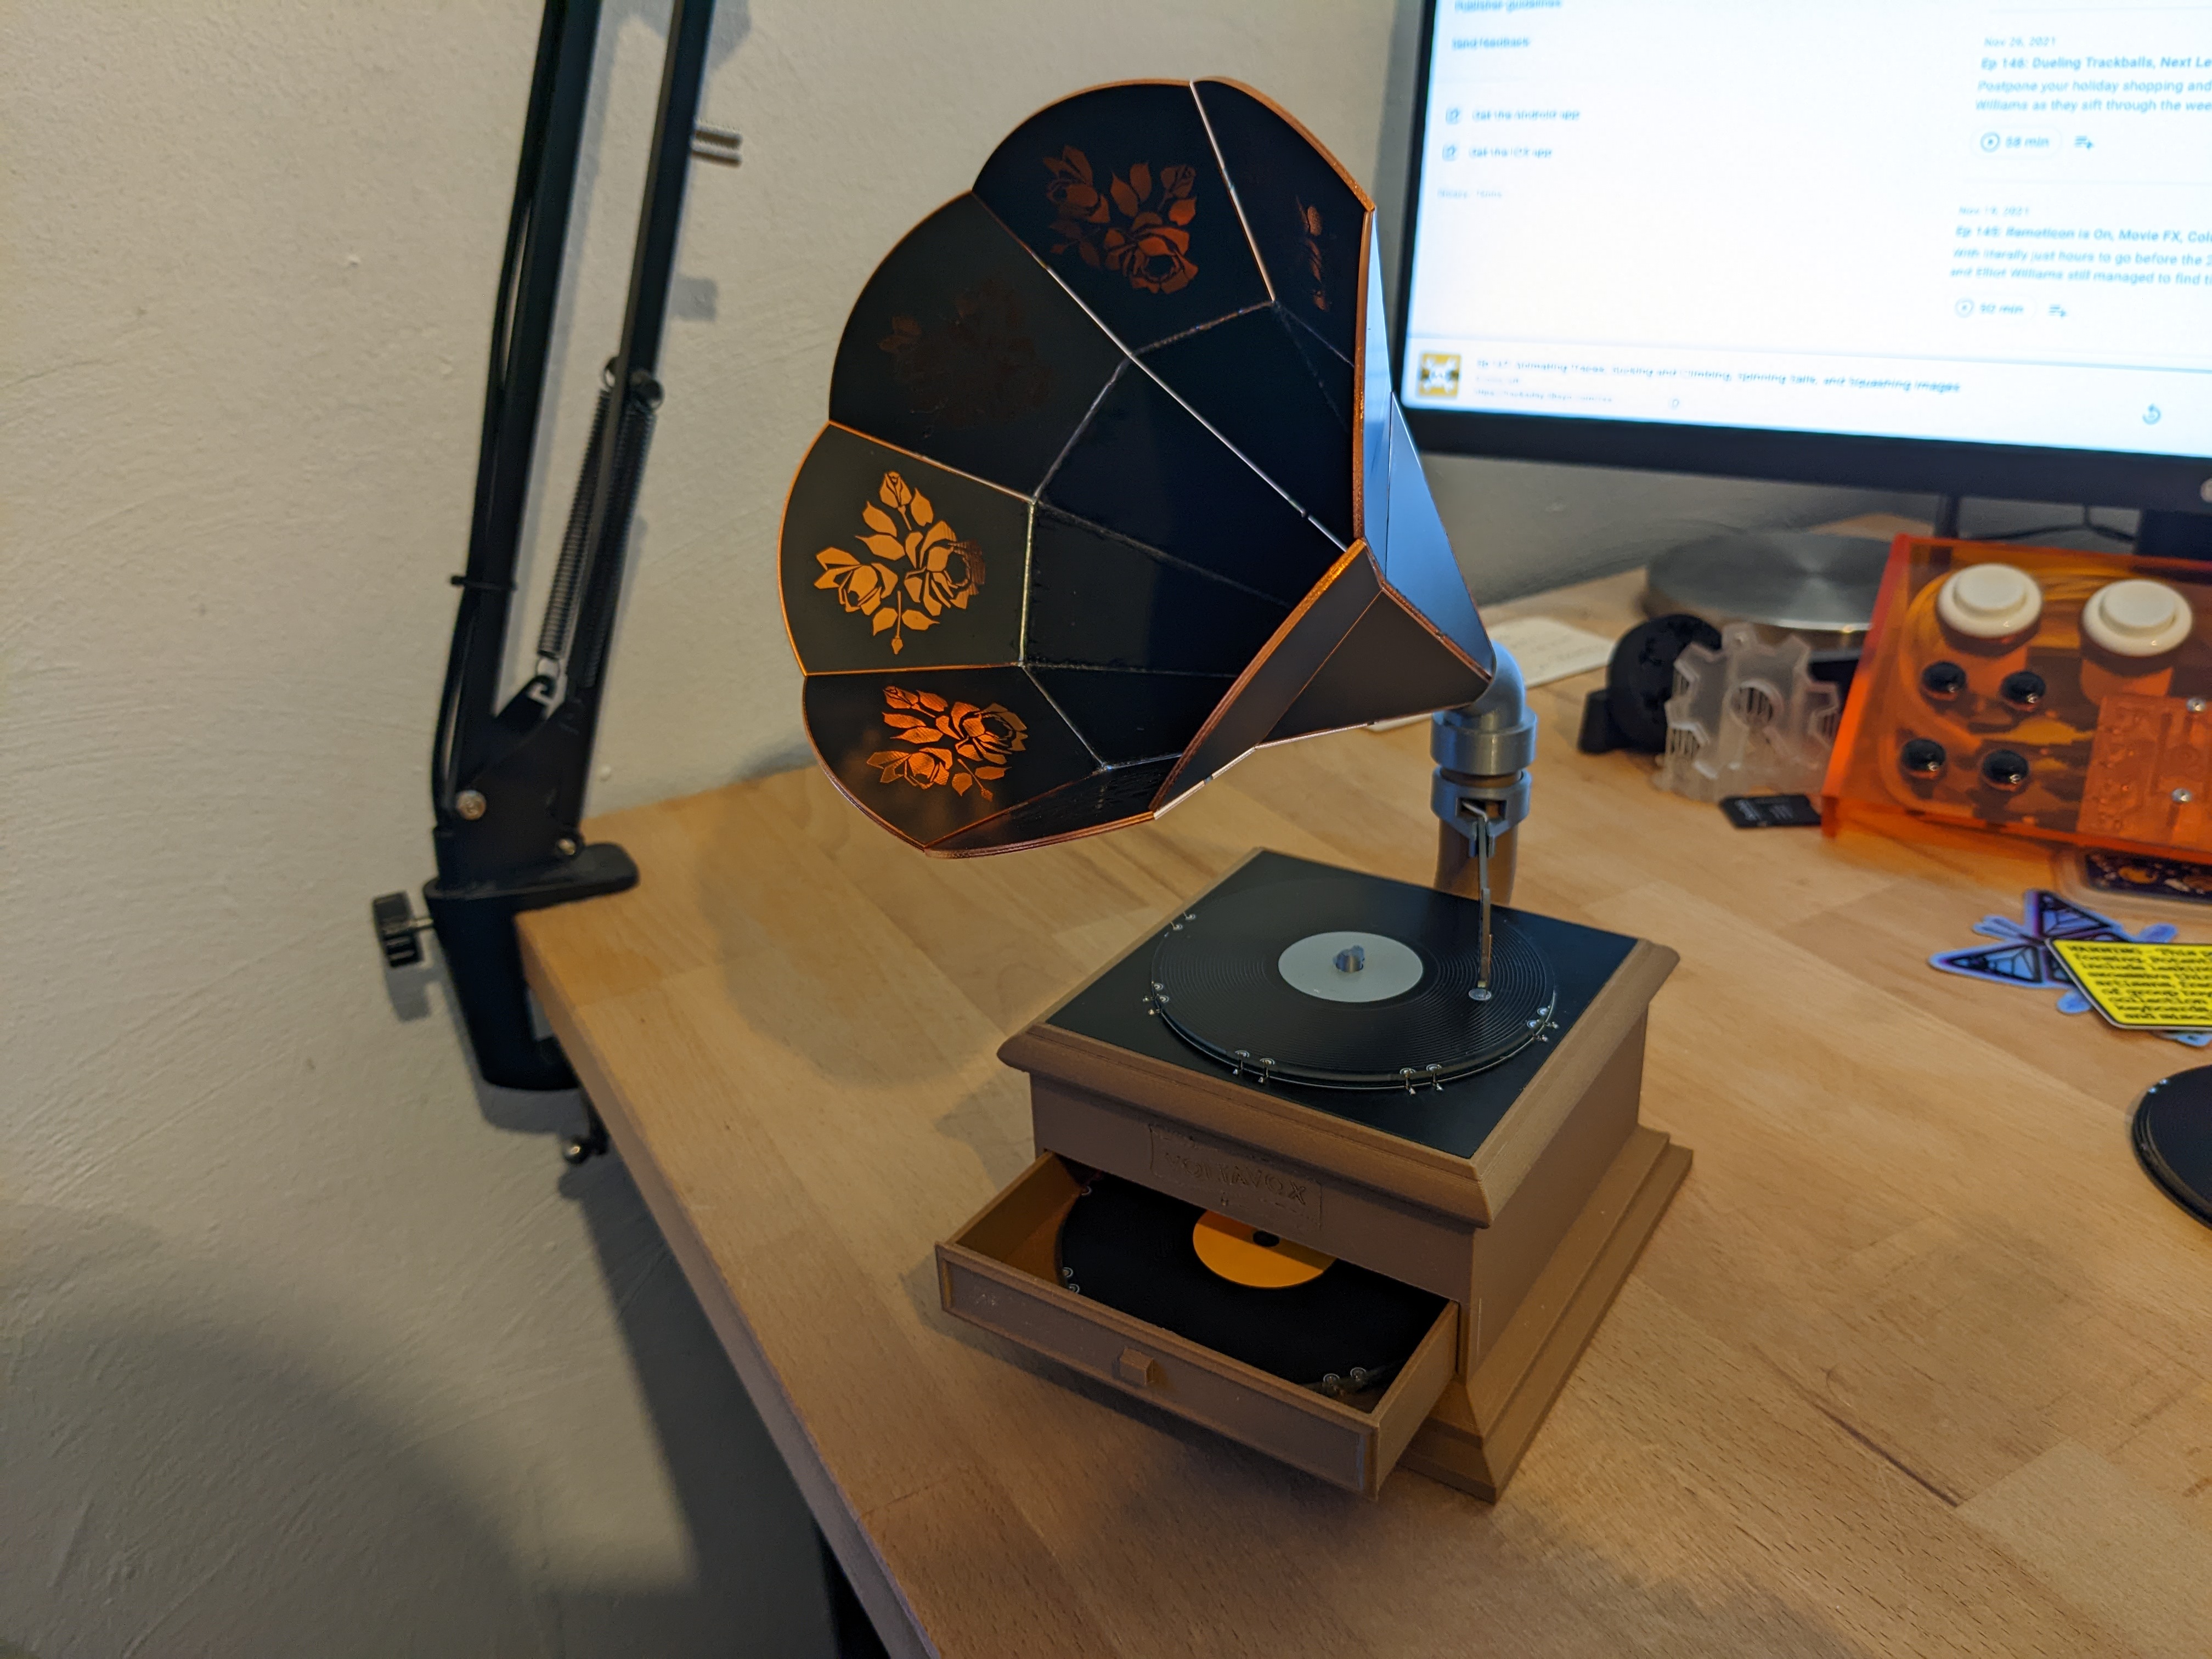
Voltavox is a PCB-based phonograph!
Made primarily from PCBs, you can take a tiny PCB record, place it on the platter, place the needle on the record, and a song begins to play! Put a different record on, and as expected, you’ll get a different song.
Voltavox is based heavily on the Adafruit Audio FX Sound Board. Using arturo182’s FlexyPins and some castellated edges on the record PCBs. Each record selectively pulls a different control pin on the Audio FX board to ground, choosing a different track. Dropping the needle onto the record completes the circuit and starts playing the audio. The horn is also comprised of PCBs soldered edge-to-edge, with a small speaker inside.
Test Fit
Before ordering any PCBs, we wanted to make sure all our dimensions were correct. I modeled everything in Fusion 360, then printed out every piece including what would eventually become PCBs. A bit of tape and glue confirmed that our math was right, and we were ready to start designing in KiCAD.
 All parts printed and assembled for a rough fit check
PCBs
There are no fewer than five custom PCBs in Voltavox. Two for the horn structure, one for the needle, the record, and the record turntable.
On the outer rim of panels for the horn, I designed a rose inlay pattern in KiCAD, mimicking the classic location for phonograph artwork.
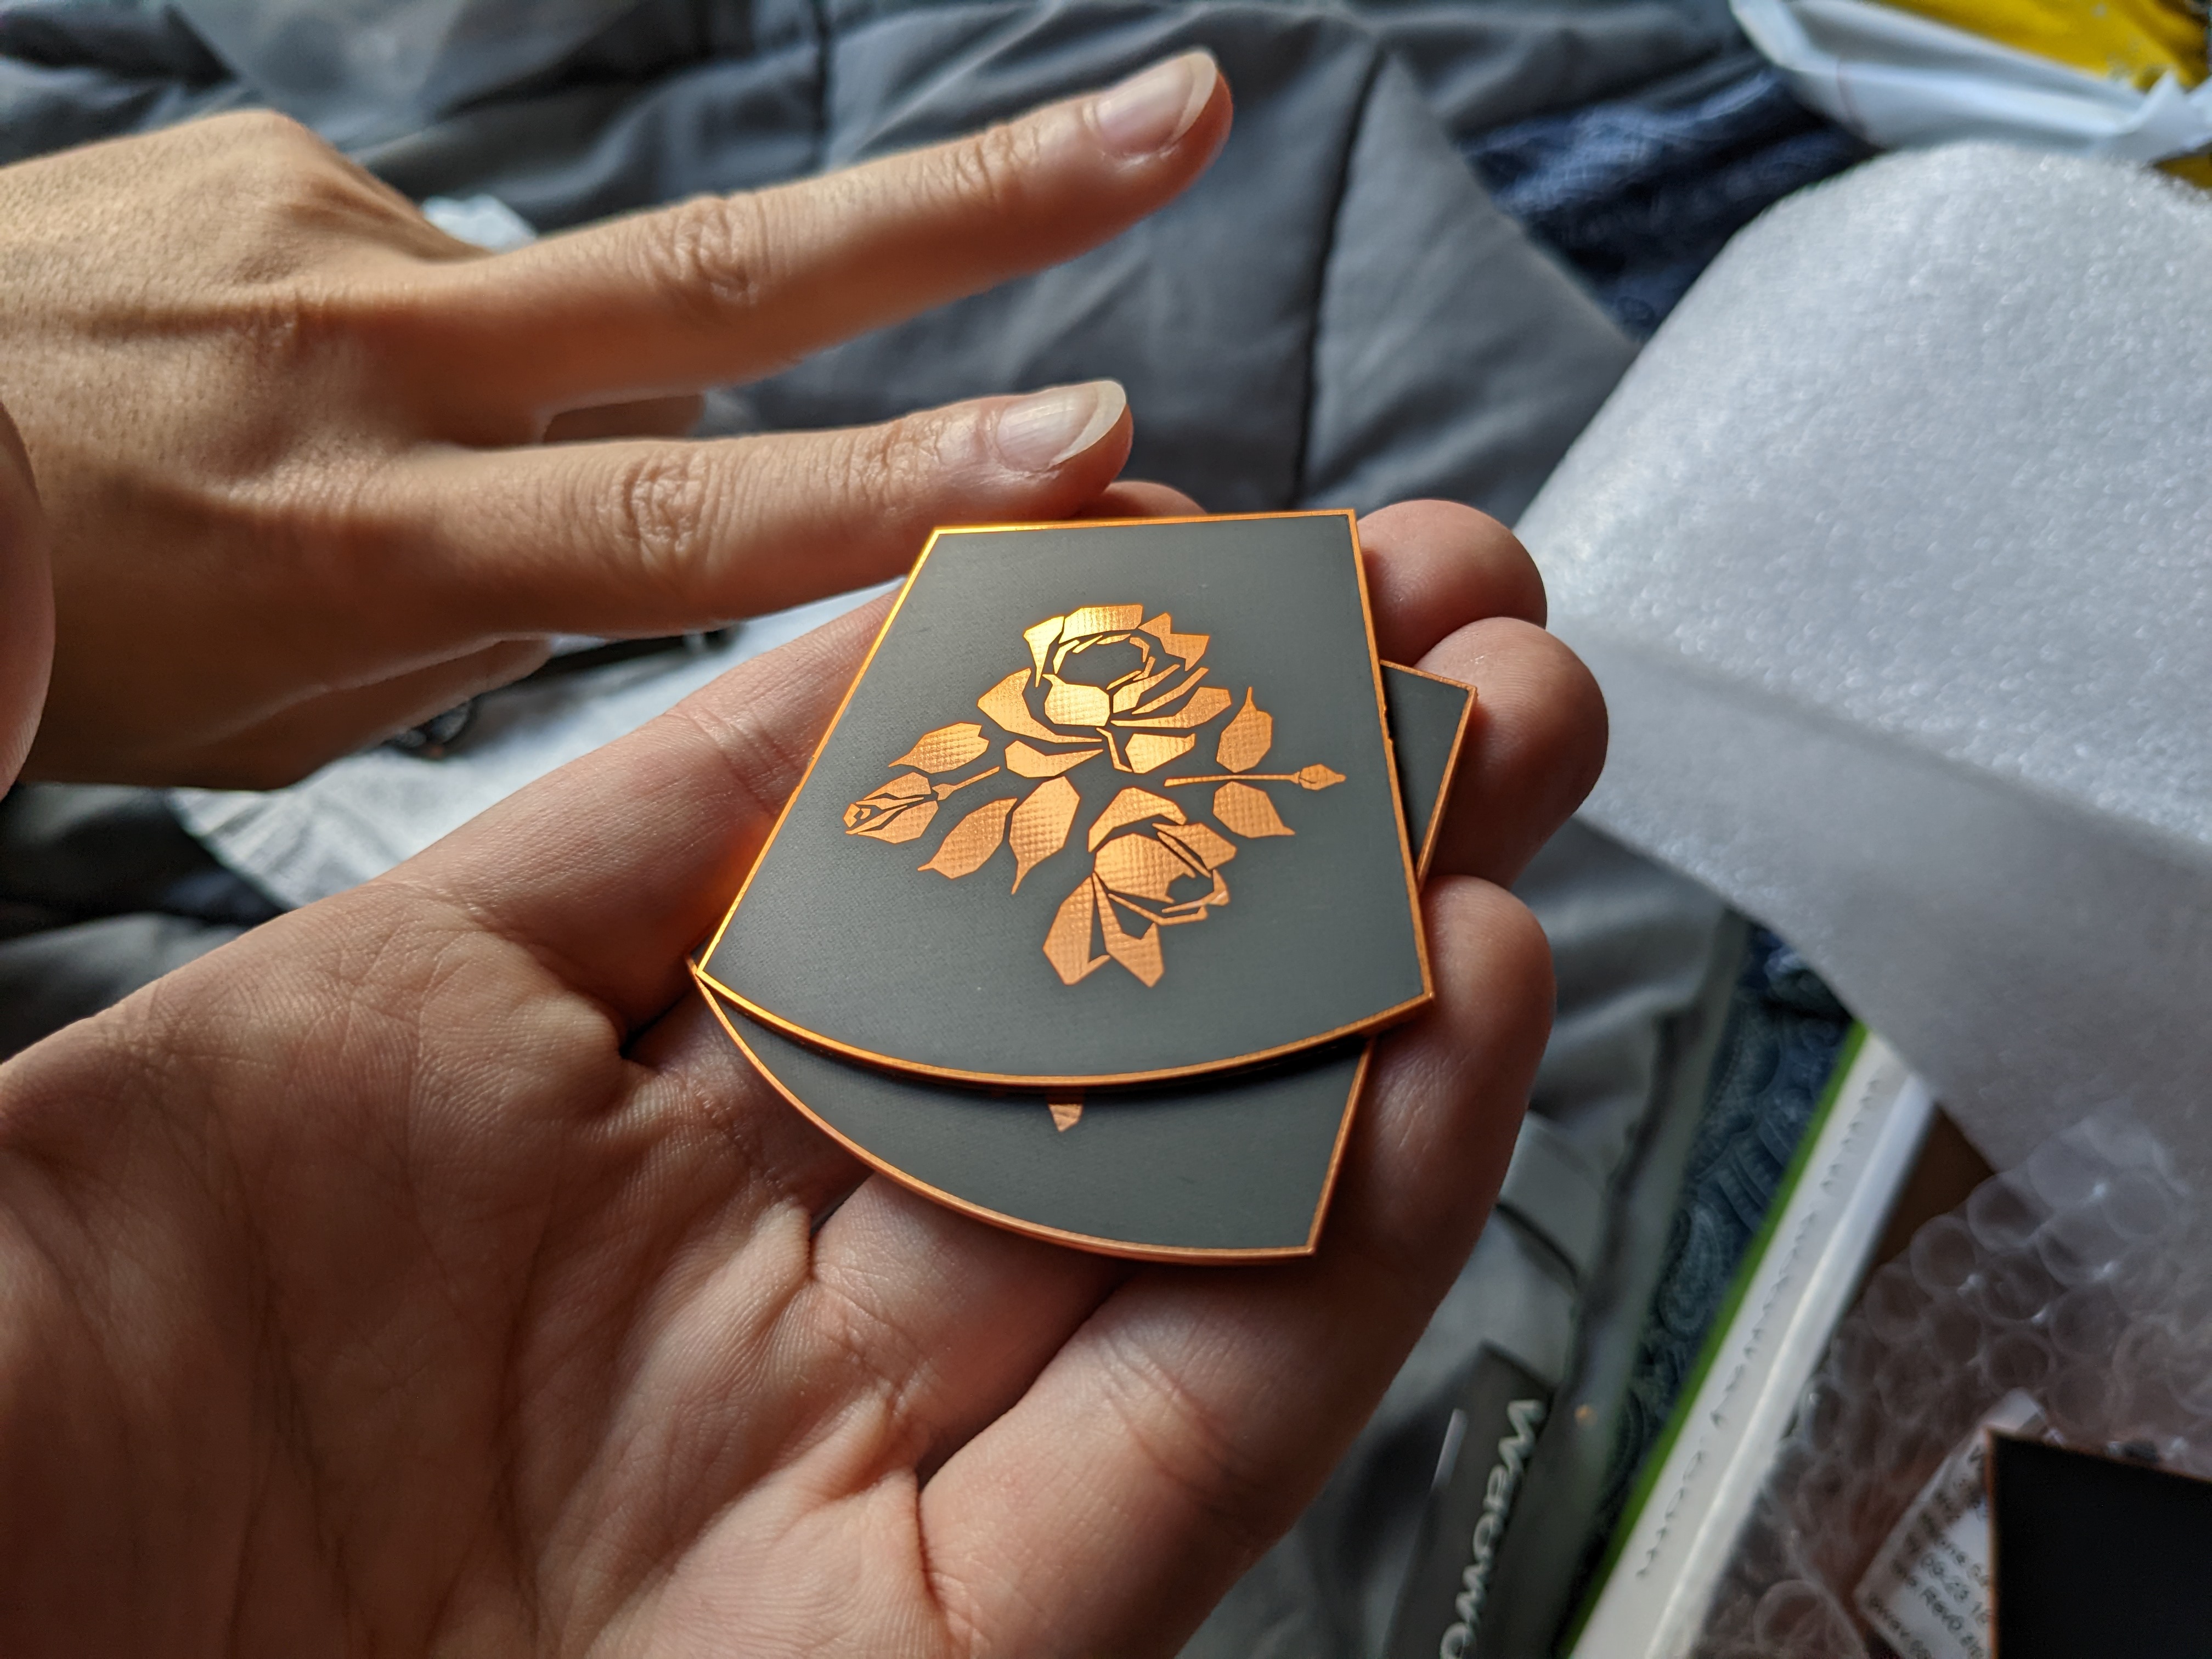 Outermost horn panel with rose artwork
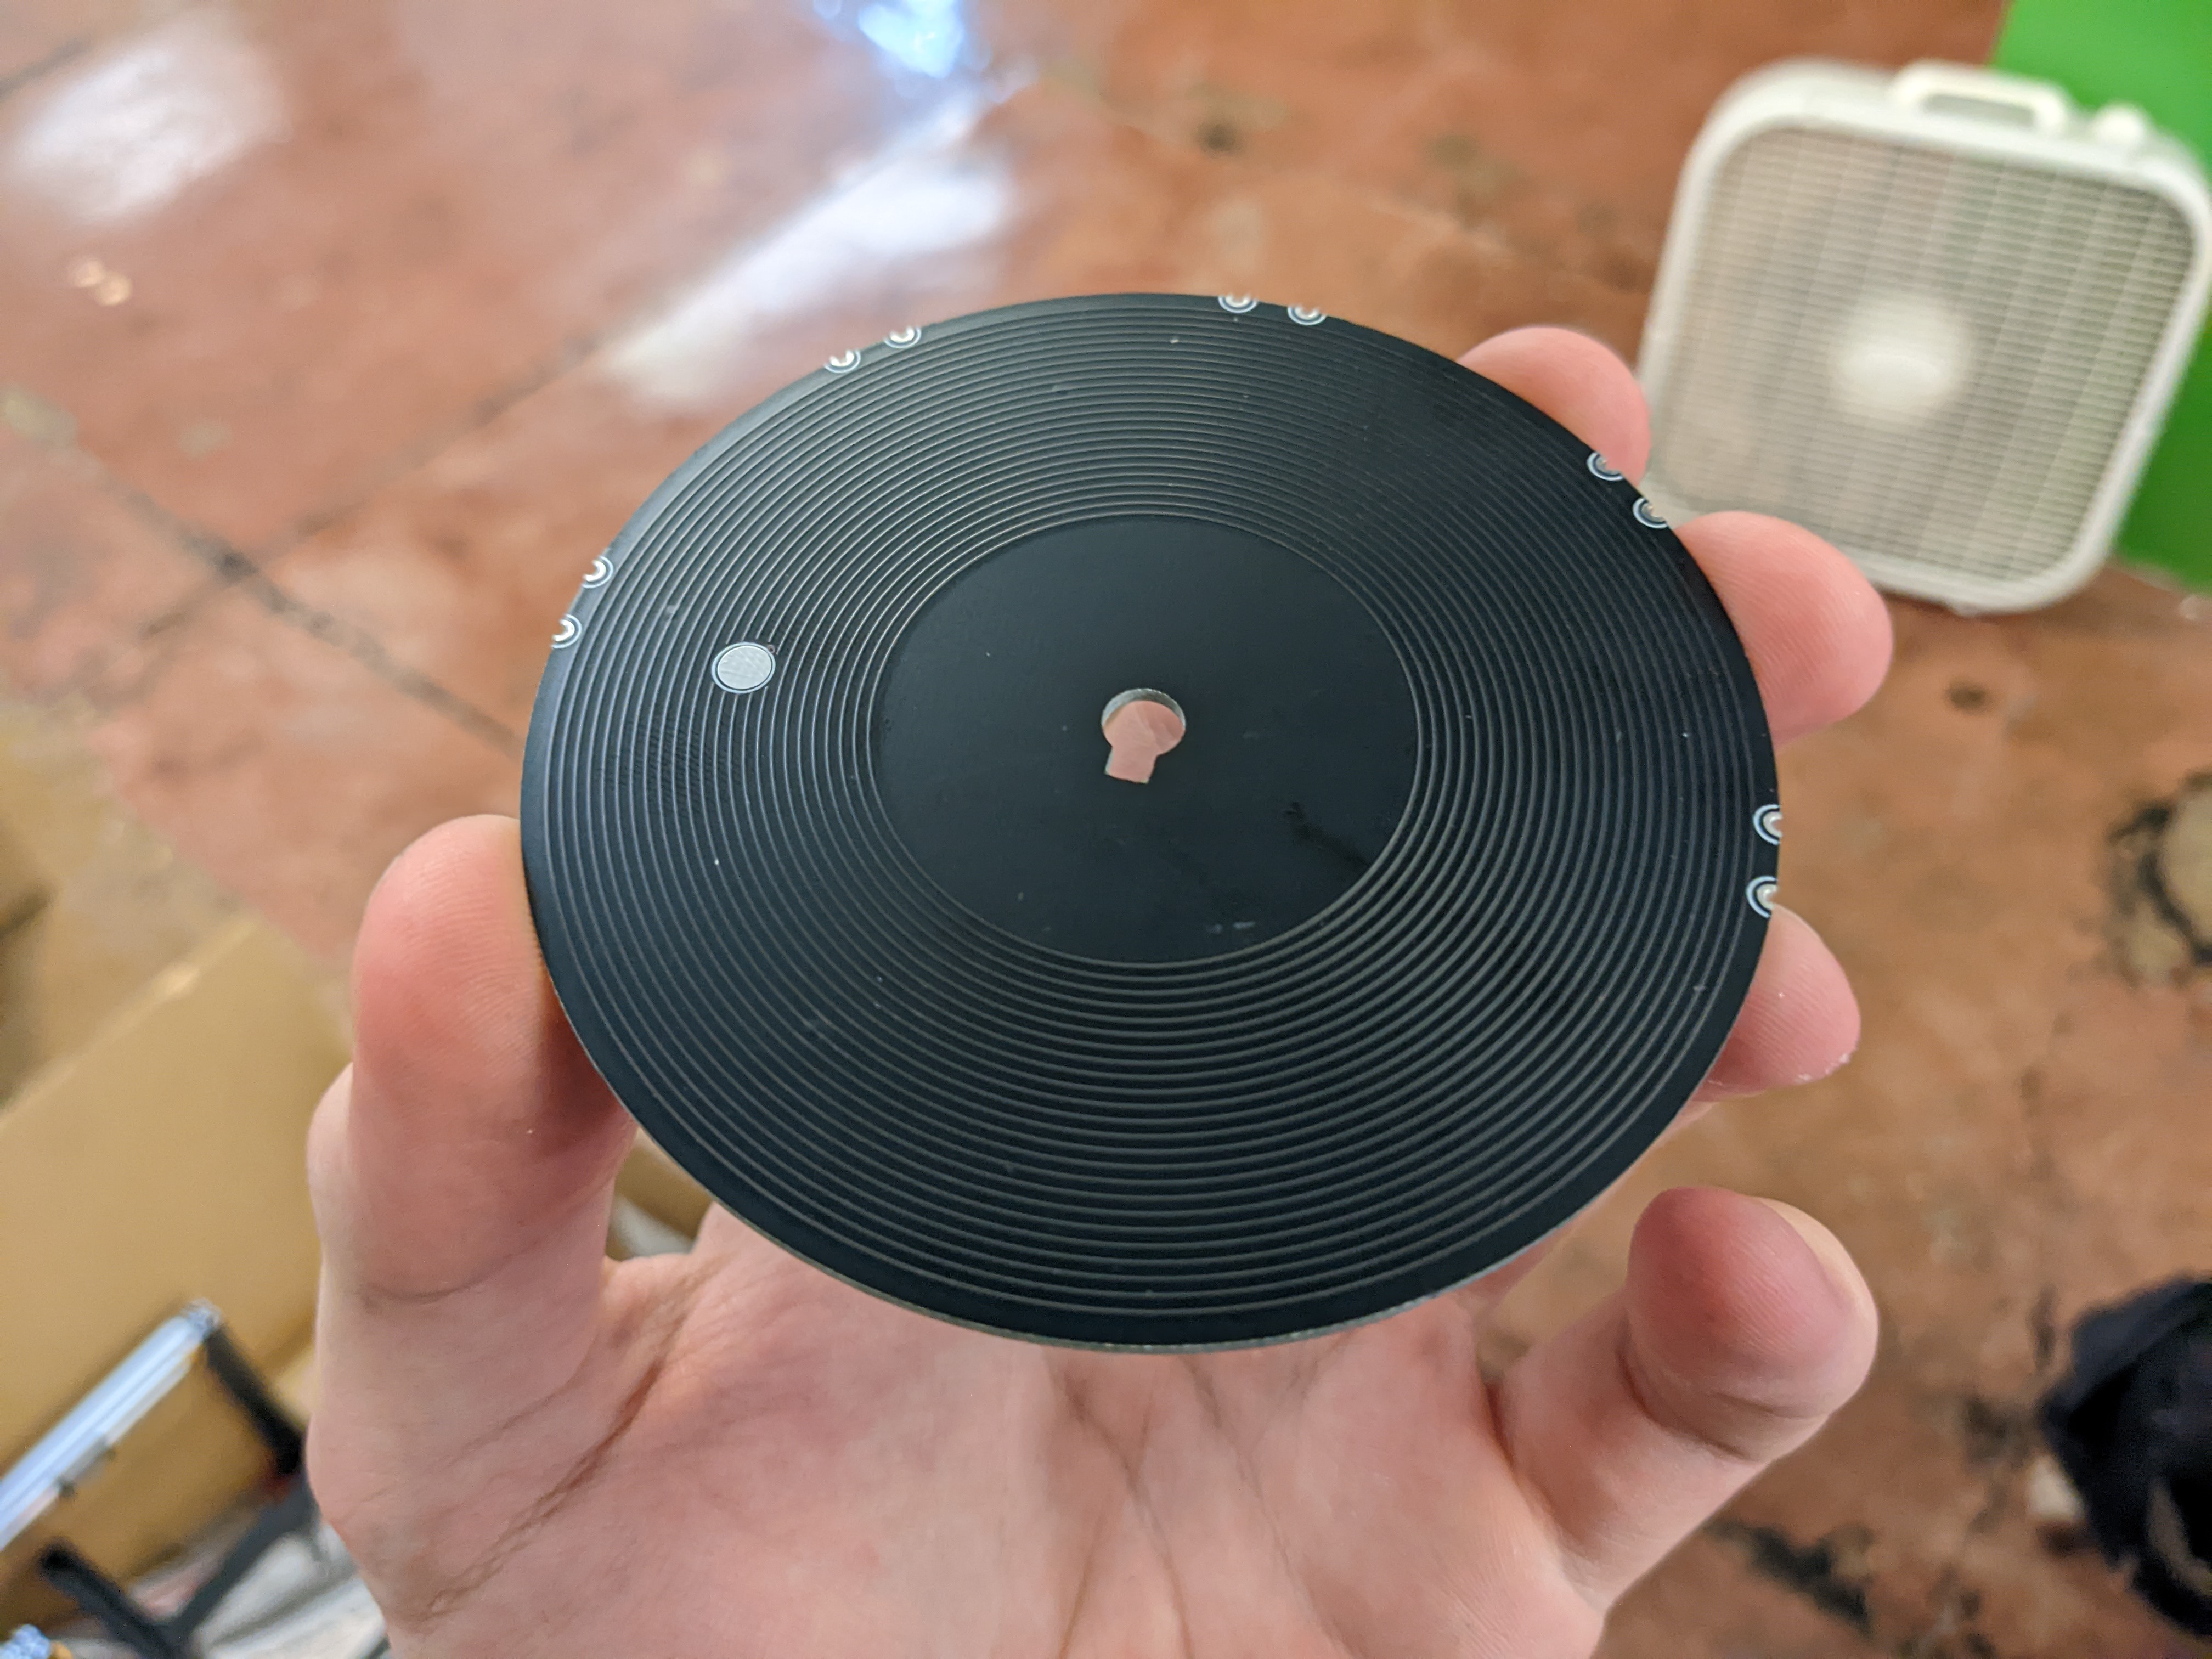
Next is the turntable! This board connects mostly everything together. It hosts the Adafruit sound board, battery connection, a pin for the needle, and spots to mount the FlexyPins.
 The top of the turntable, which will receive the record PCB
 The bottom is where everything gets connected
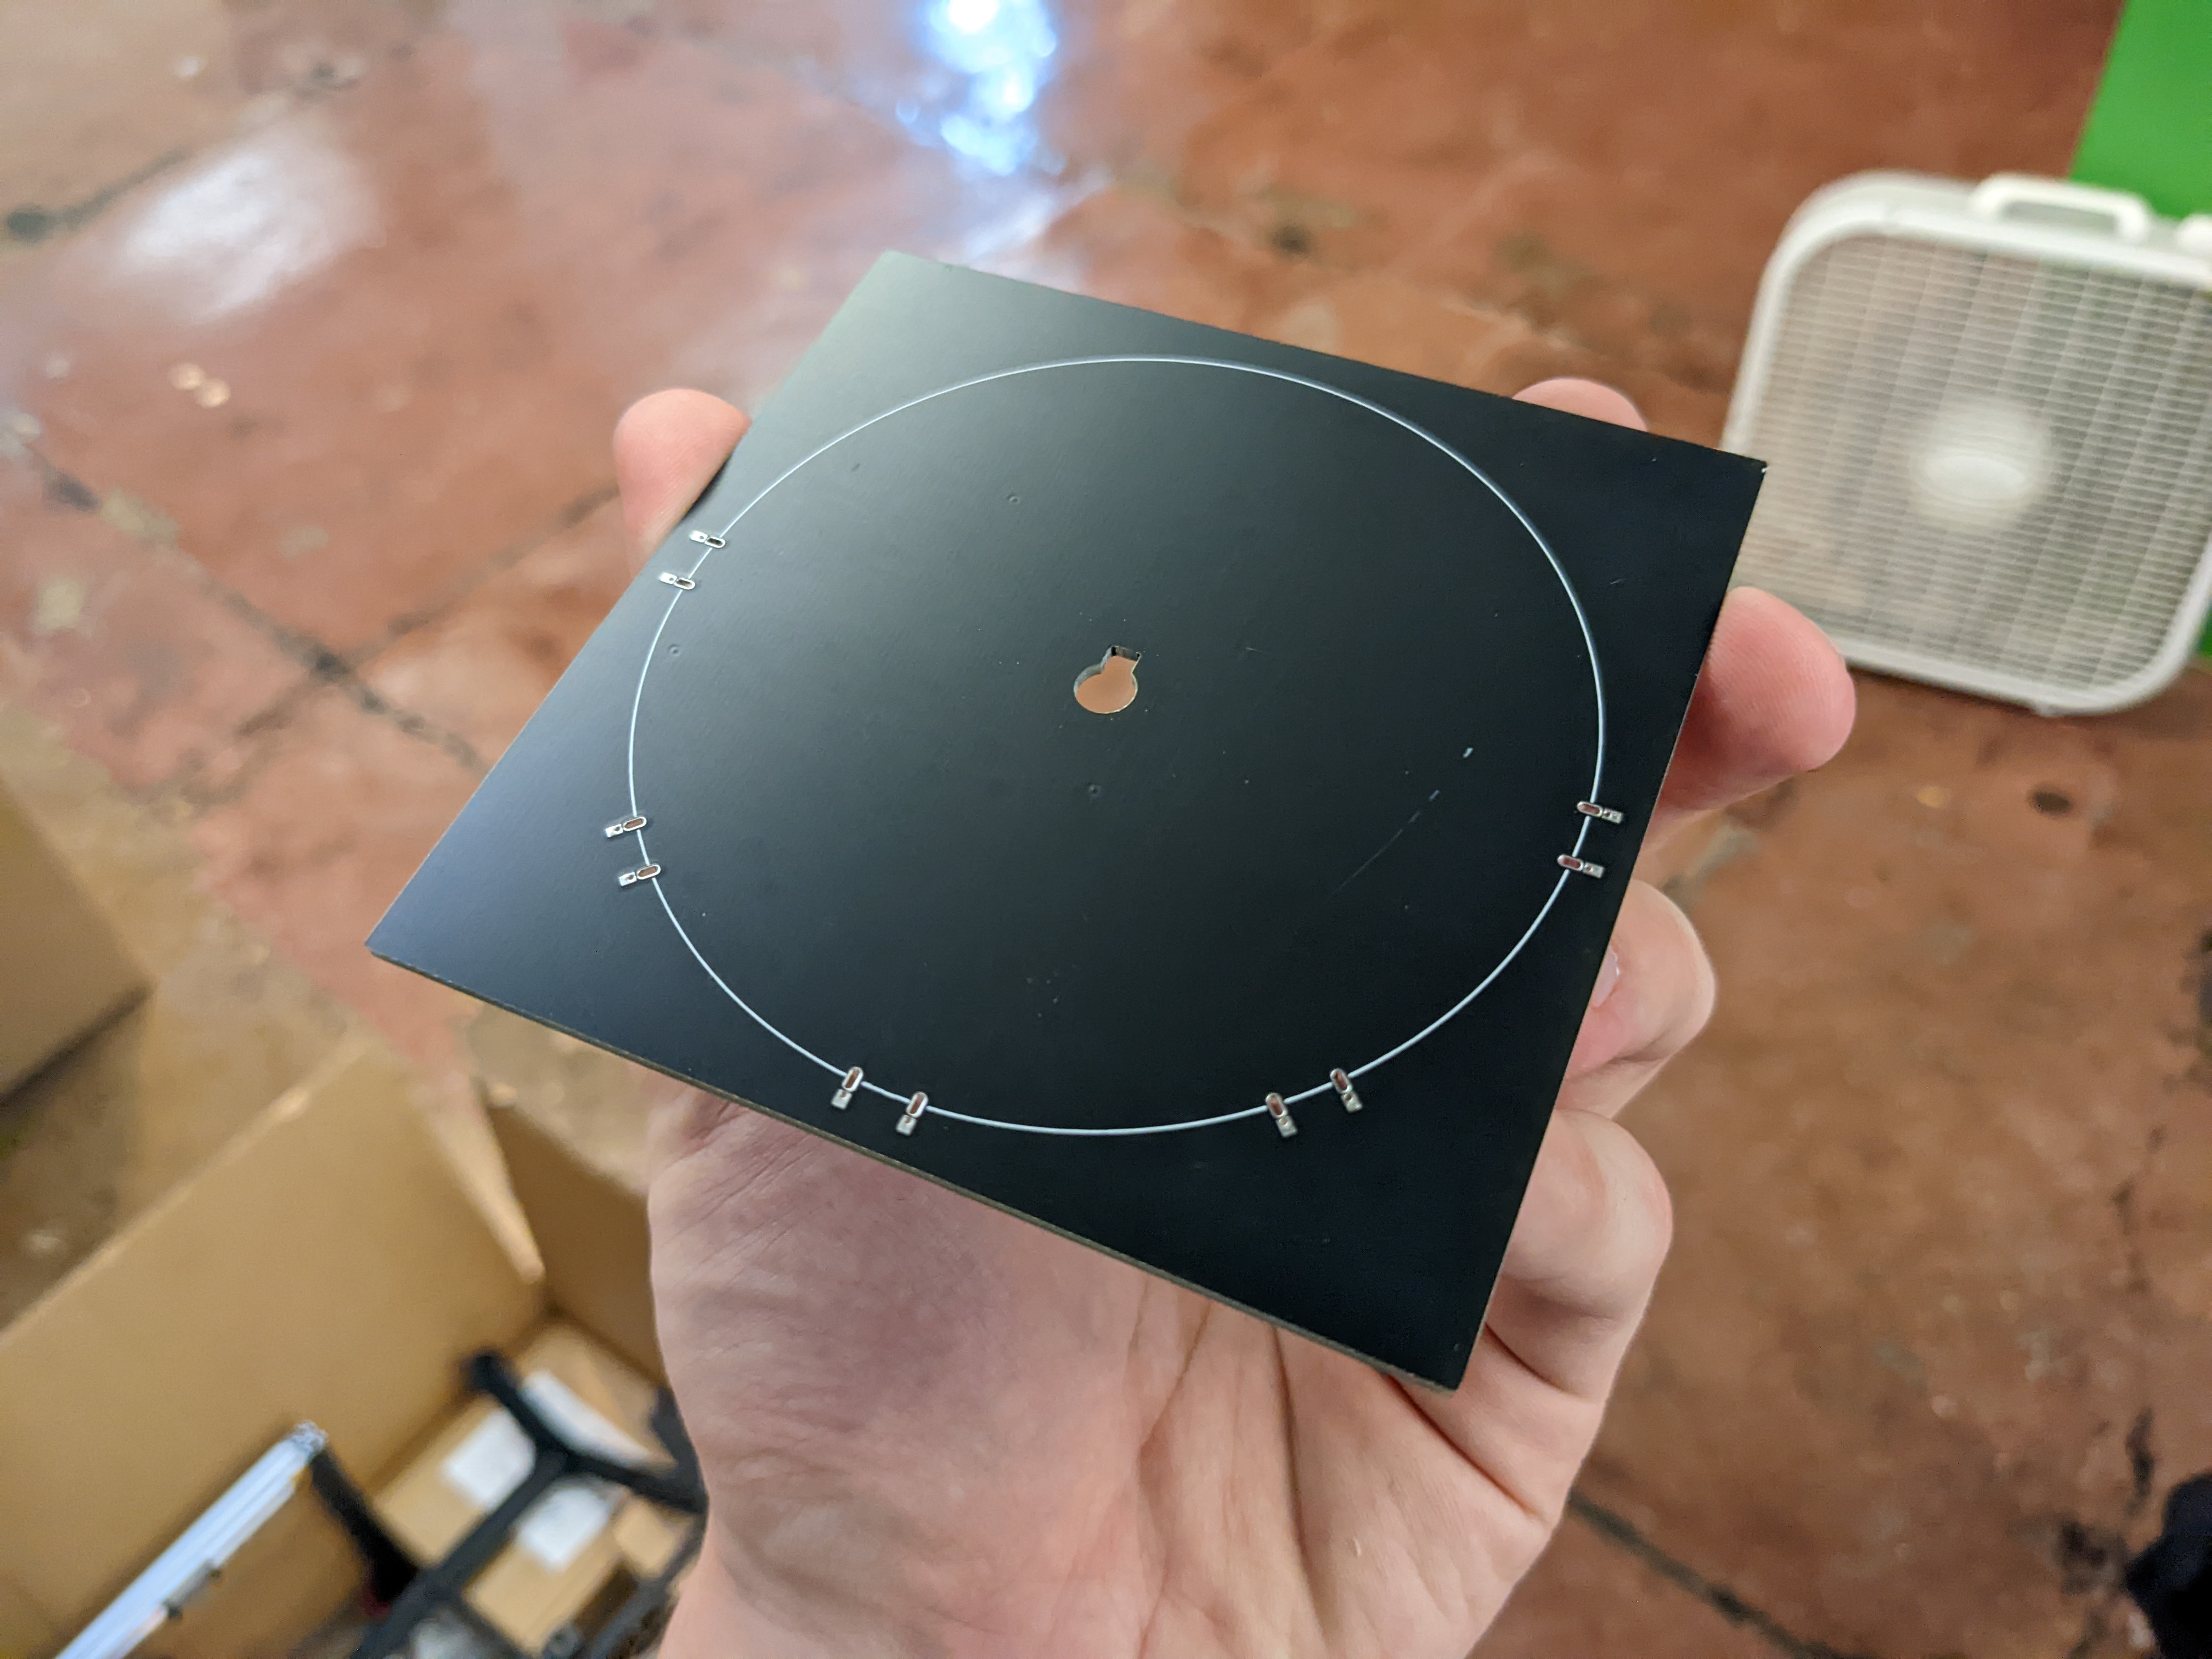
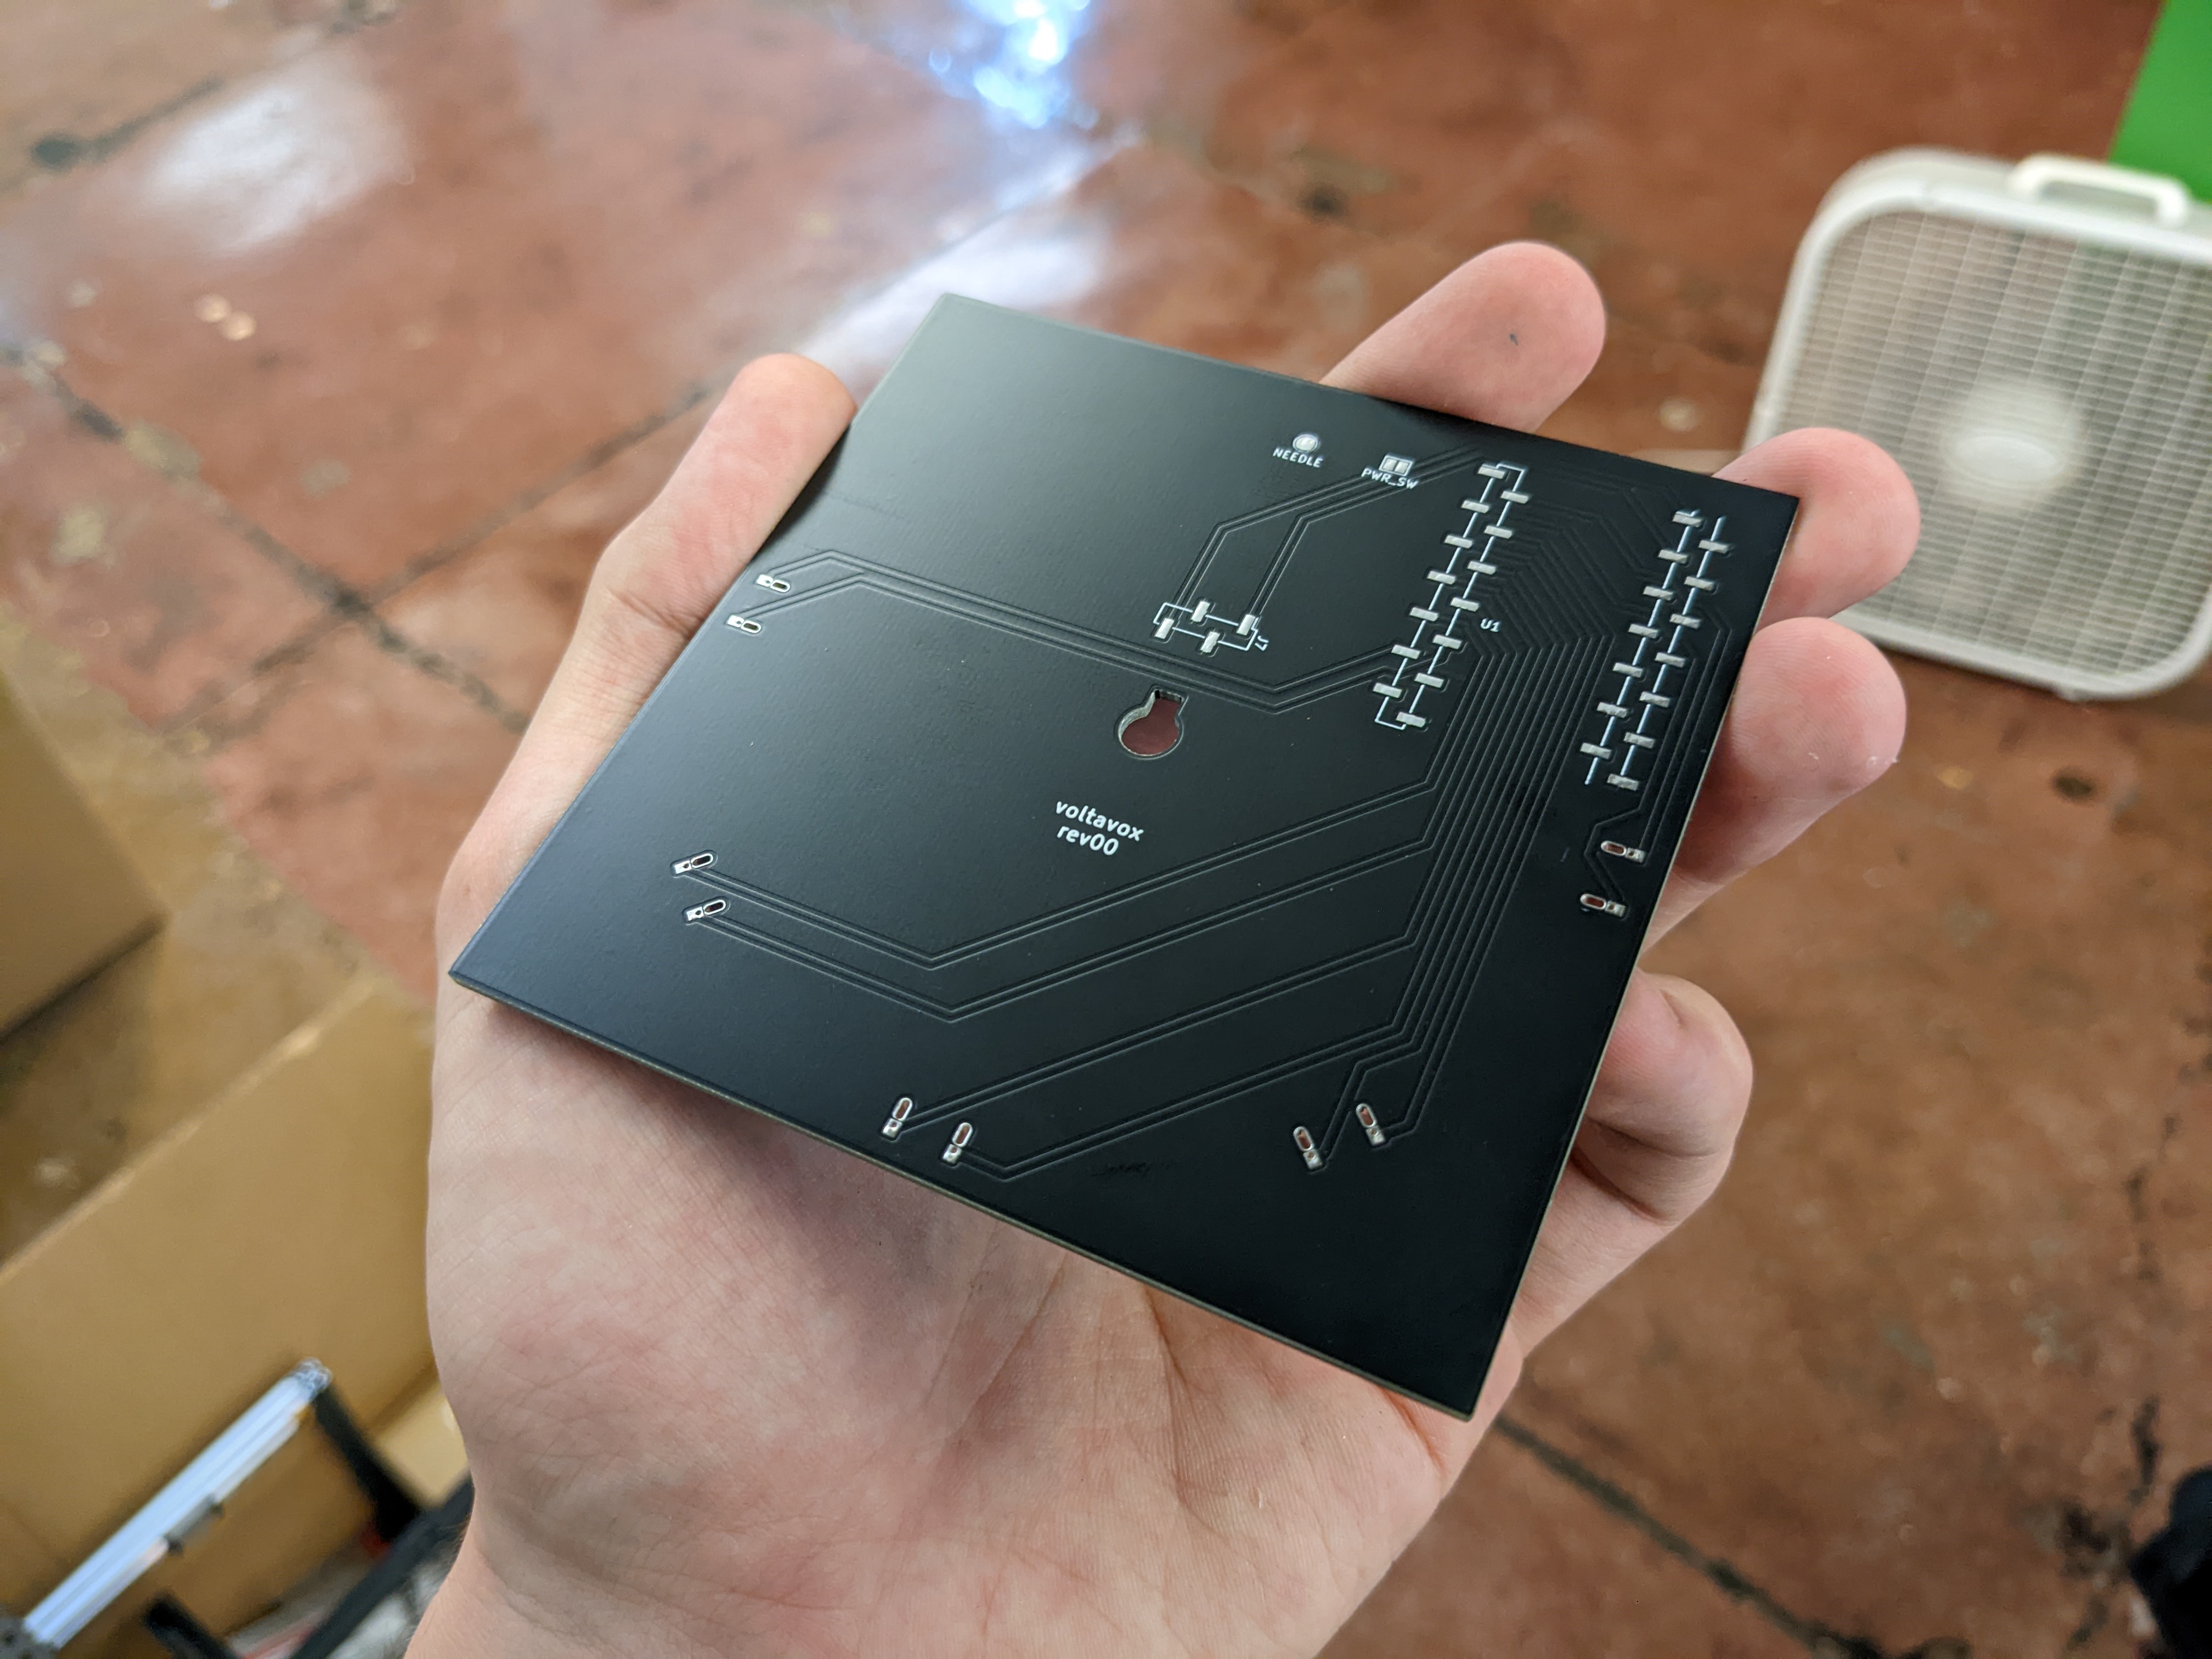
Then the record itself. The record needs to connect to each of the FlexyPins with castellated edges, have a pad on top for the needle to interface with, and have some solder-selectable jumpers on the bottom to choose which song should be played.
 The record has some dummy traces on the top to simulate grooves
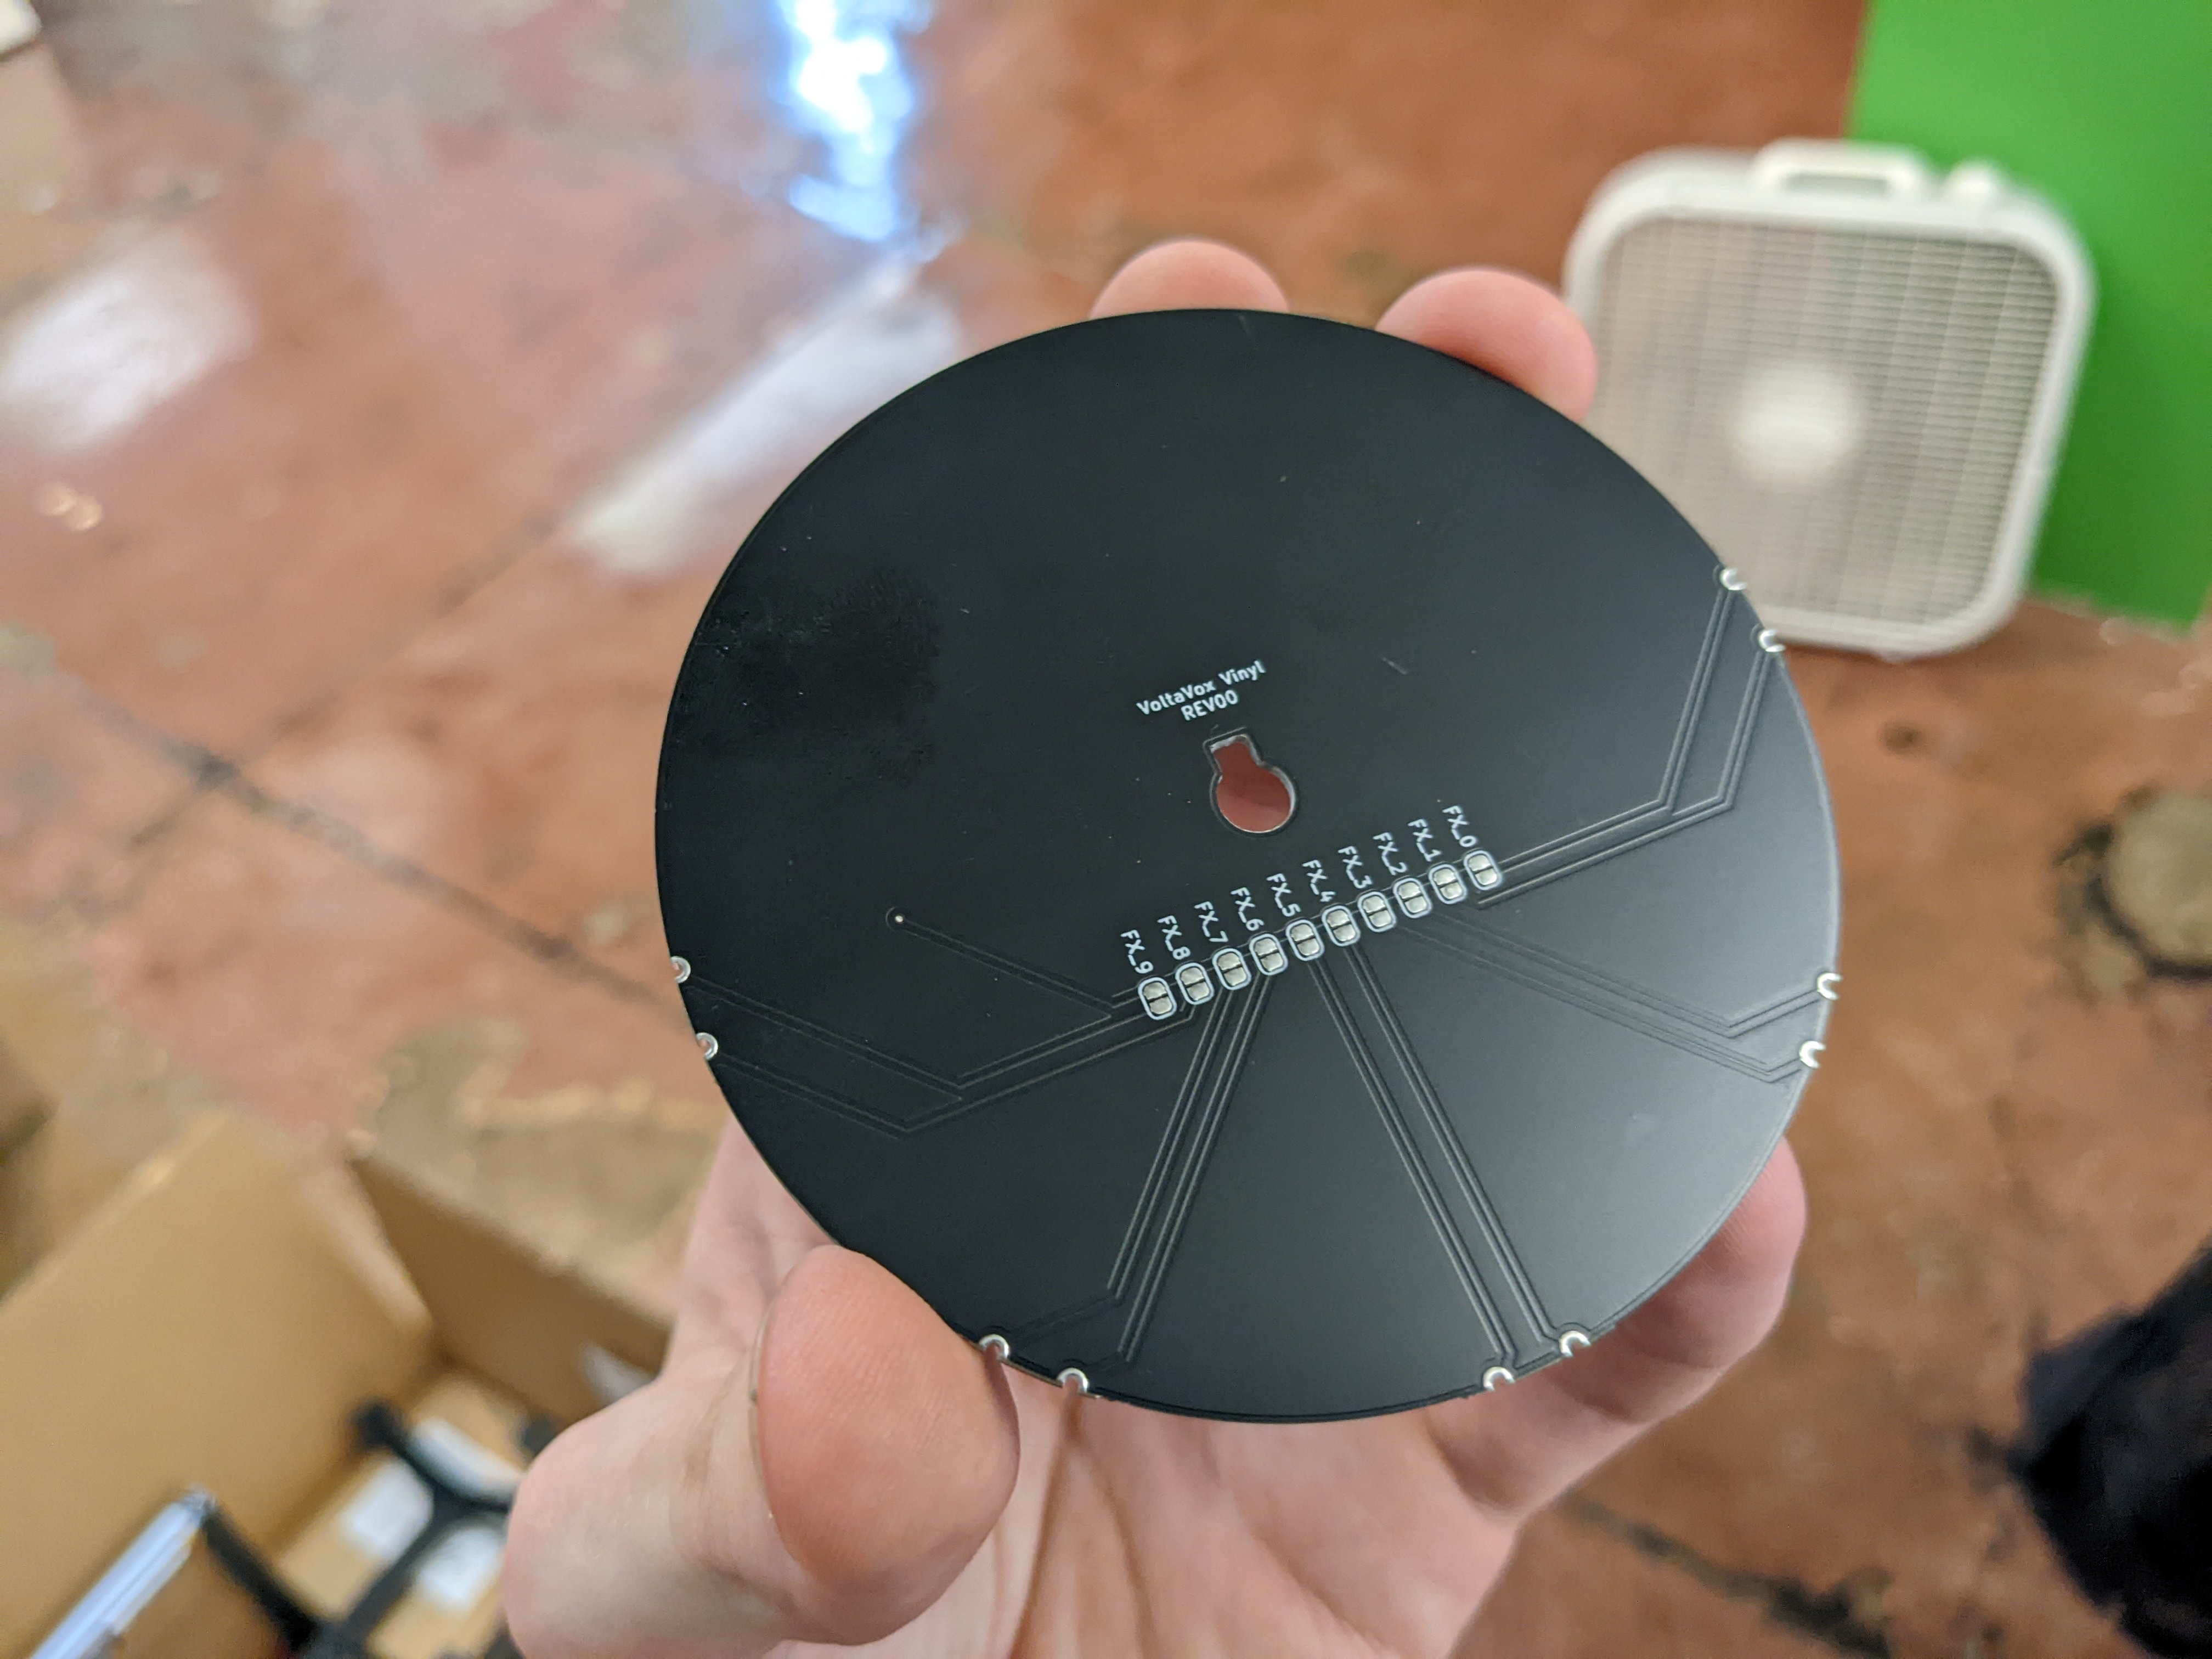 The bottom has jumpers for up to ten songs
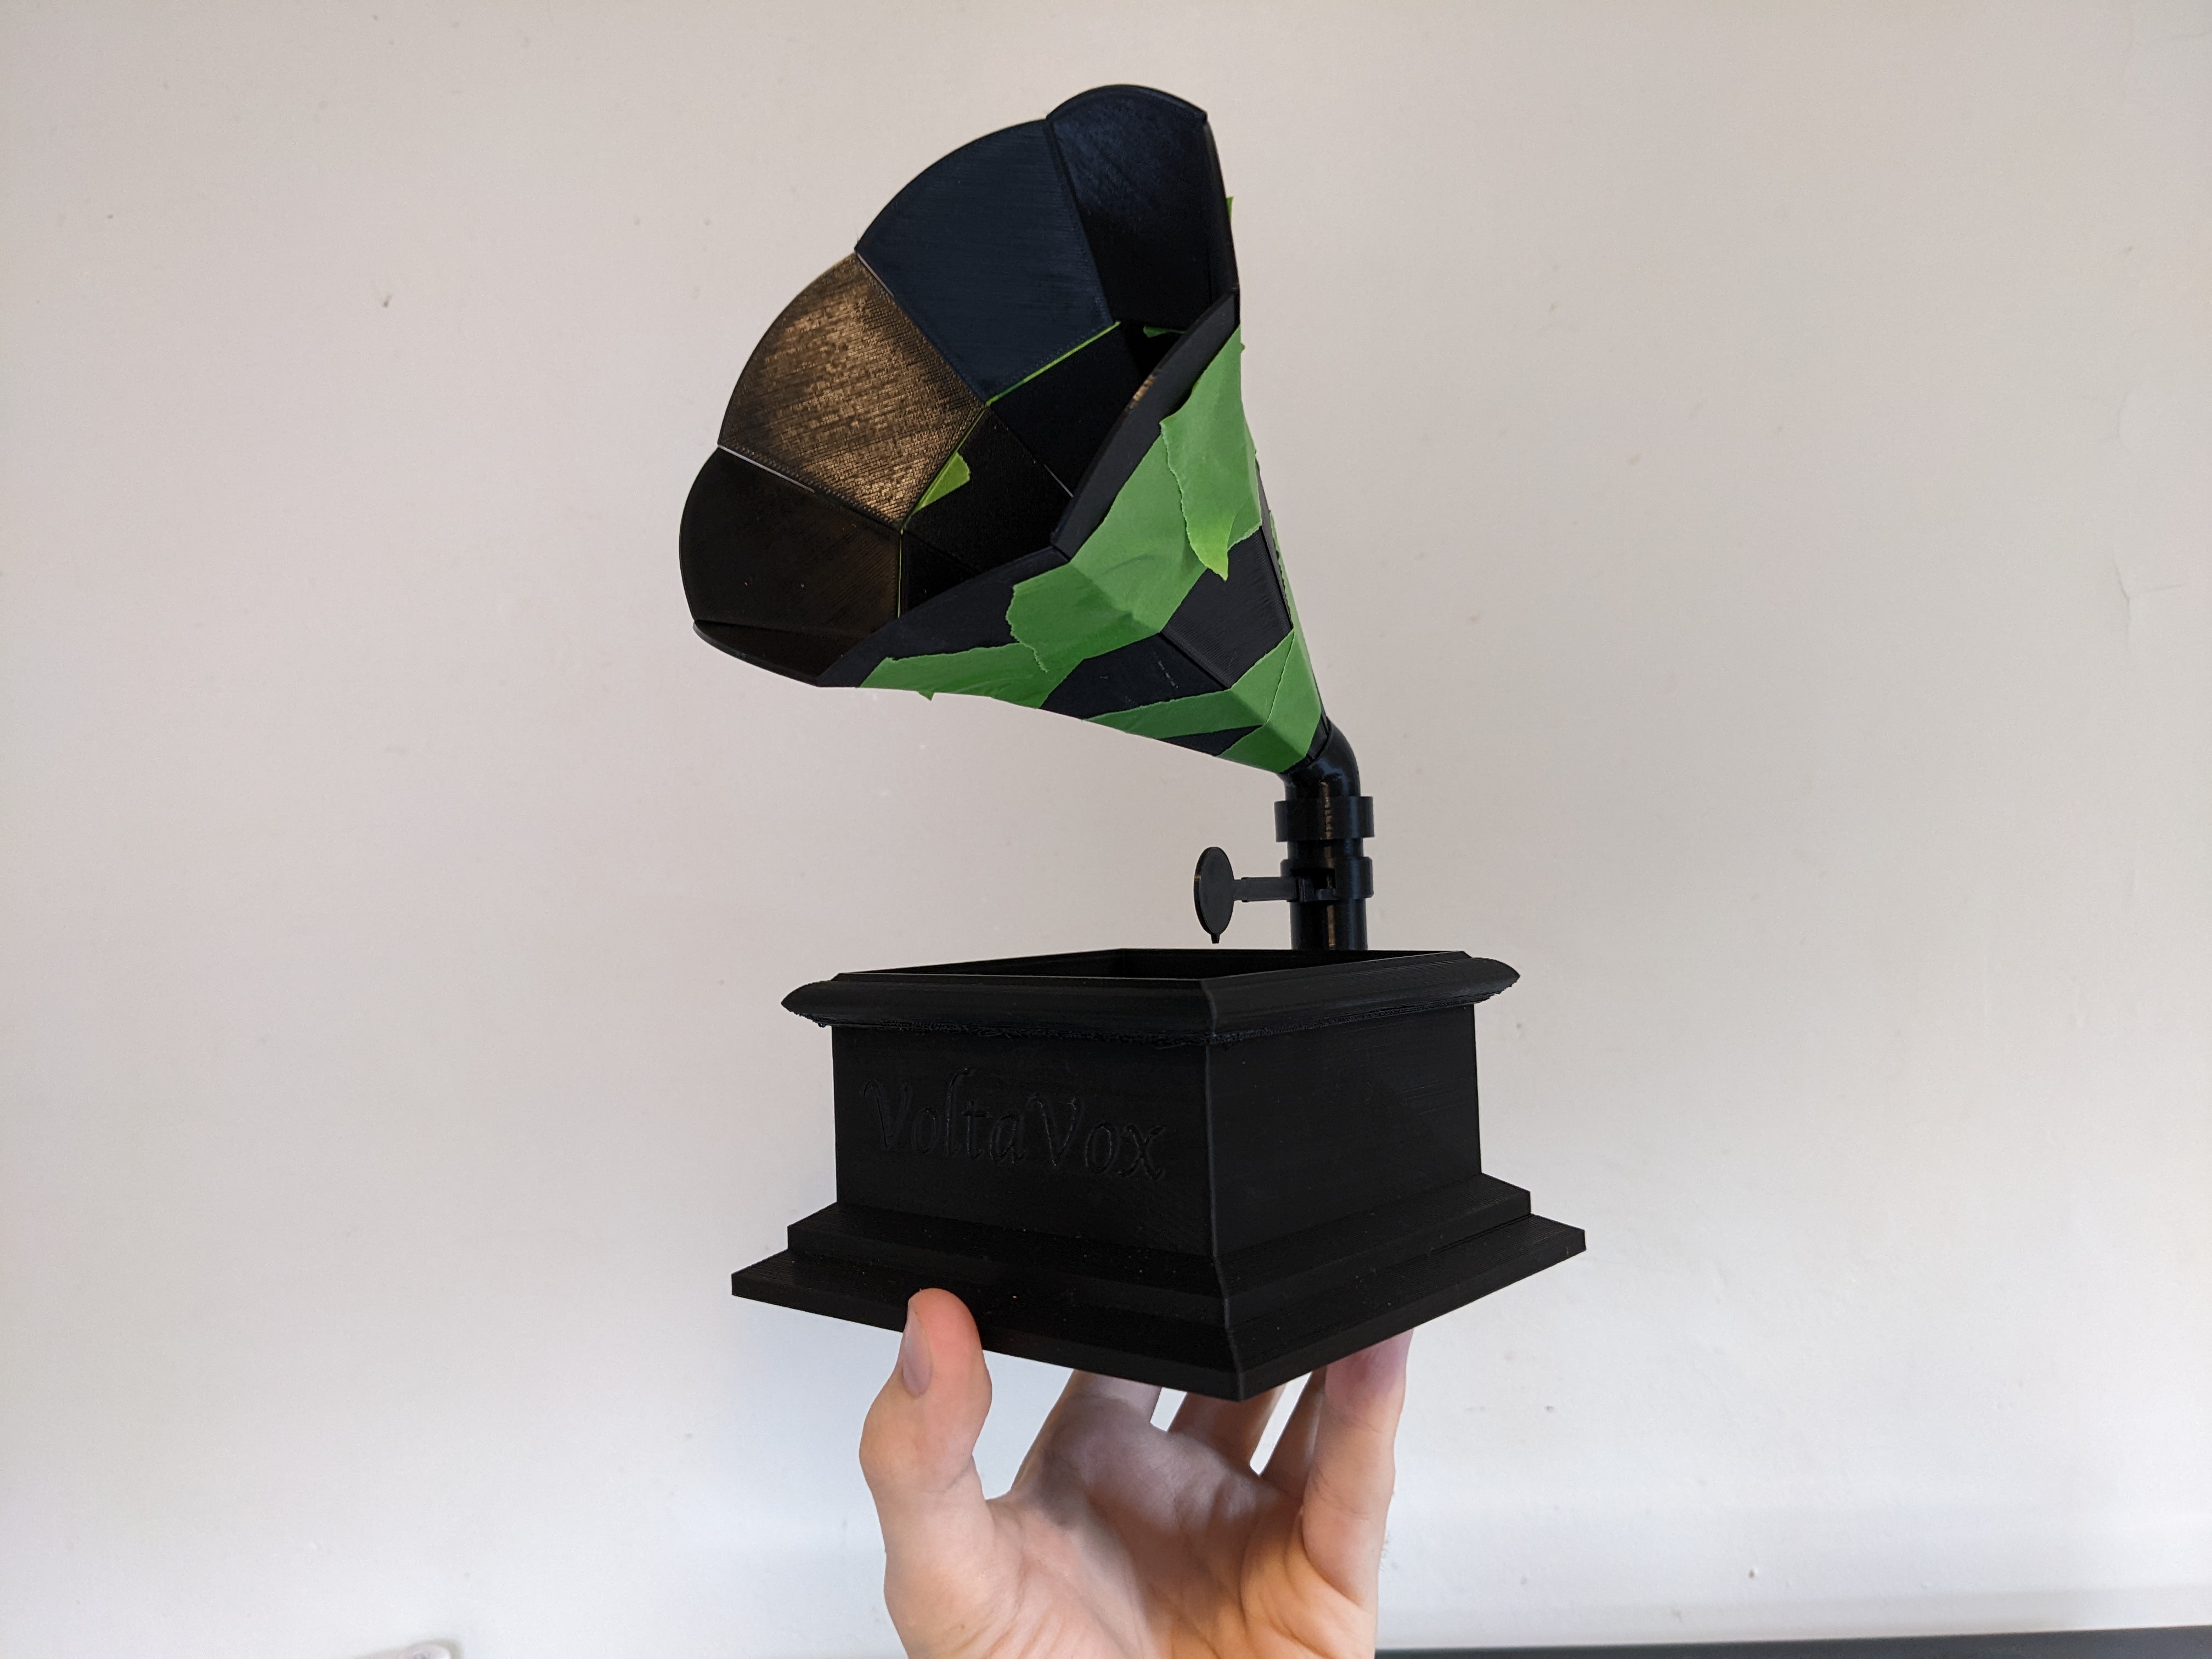
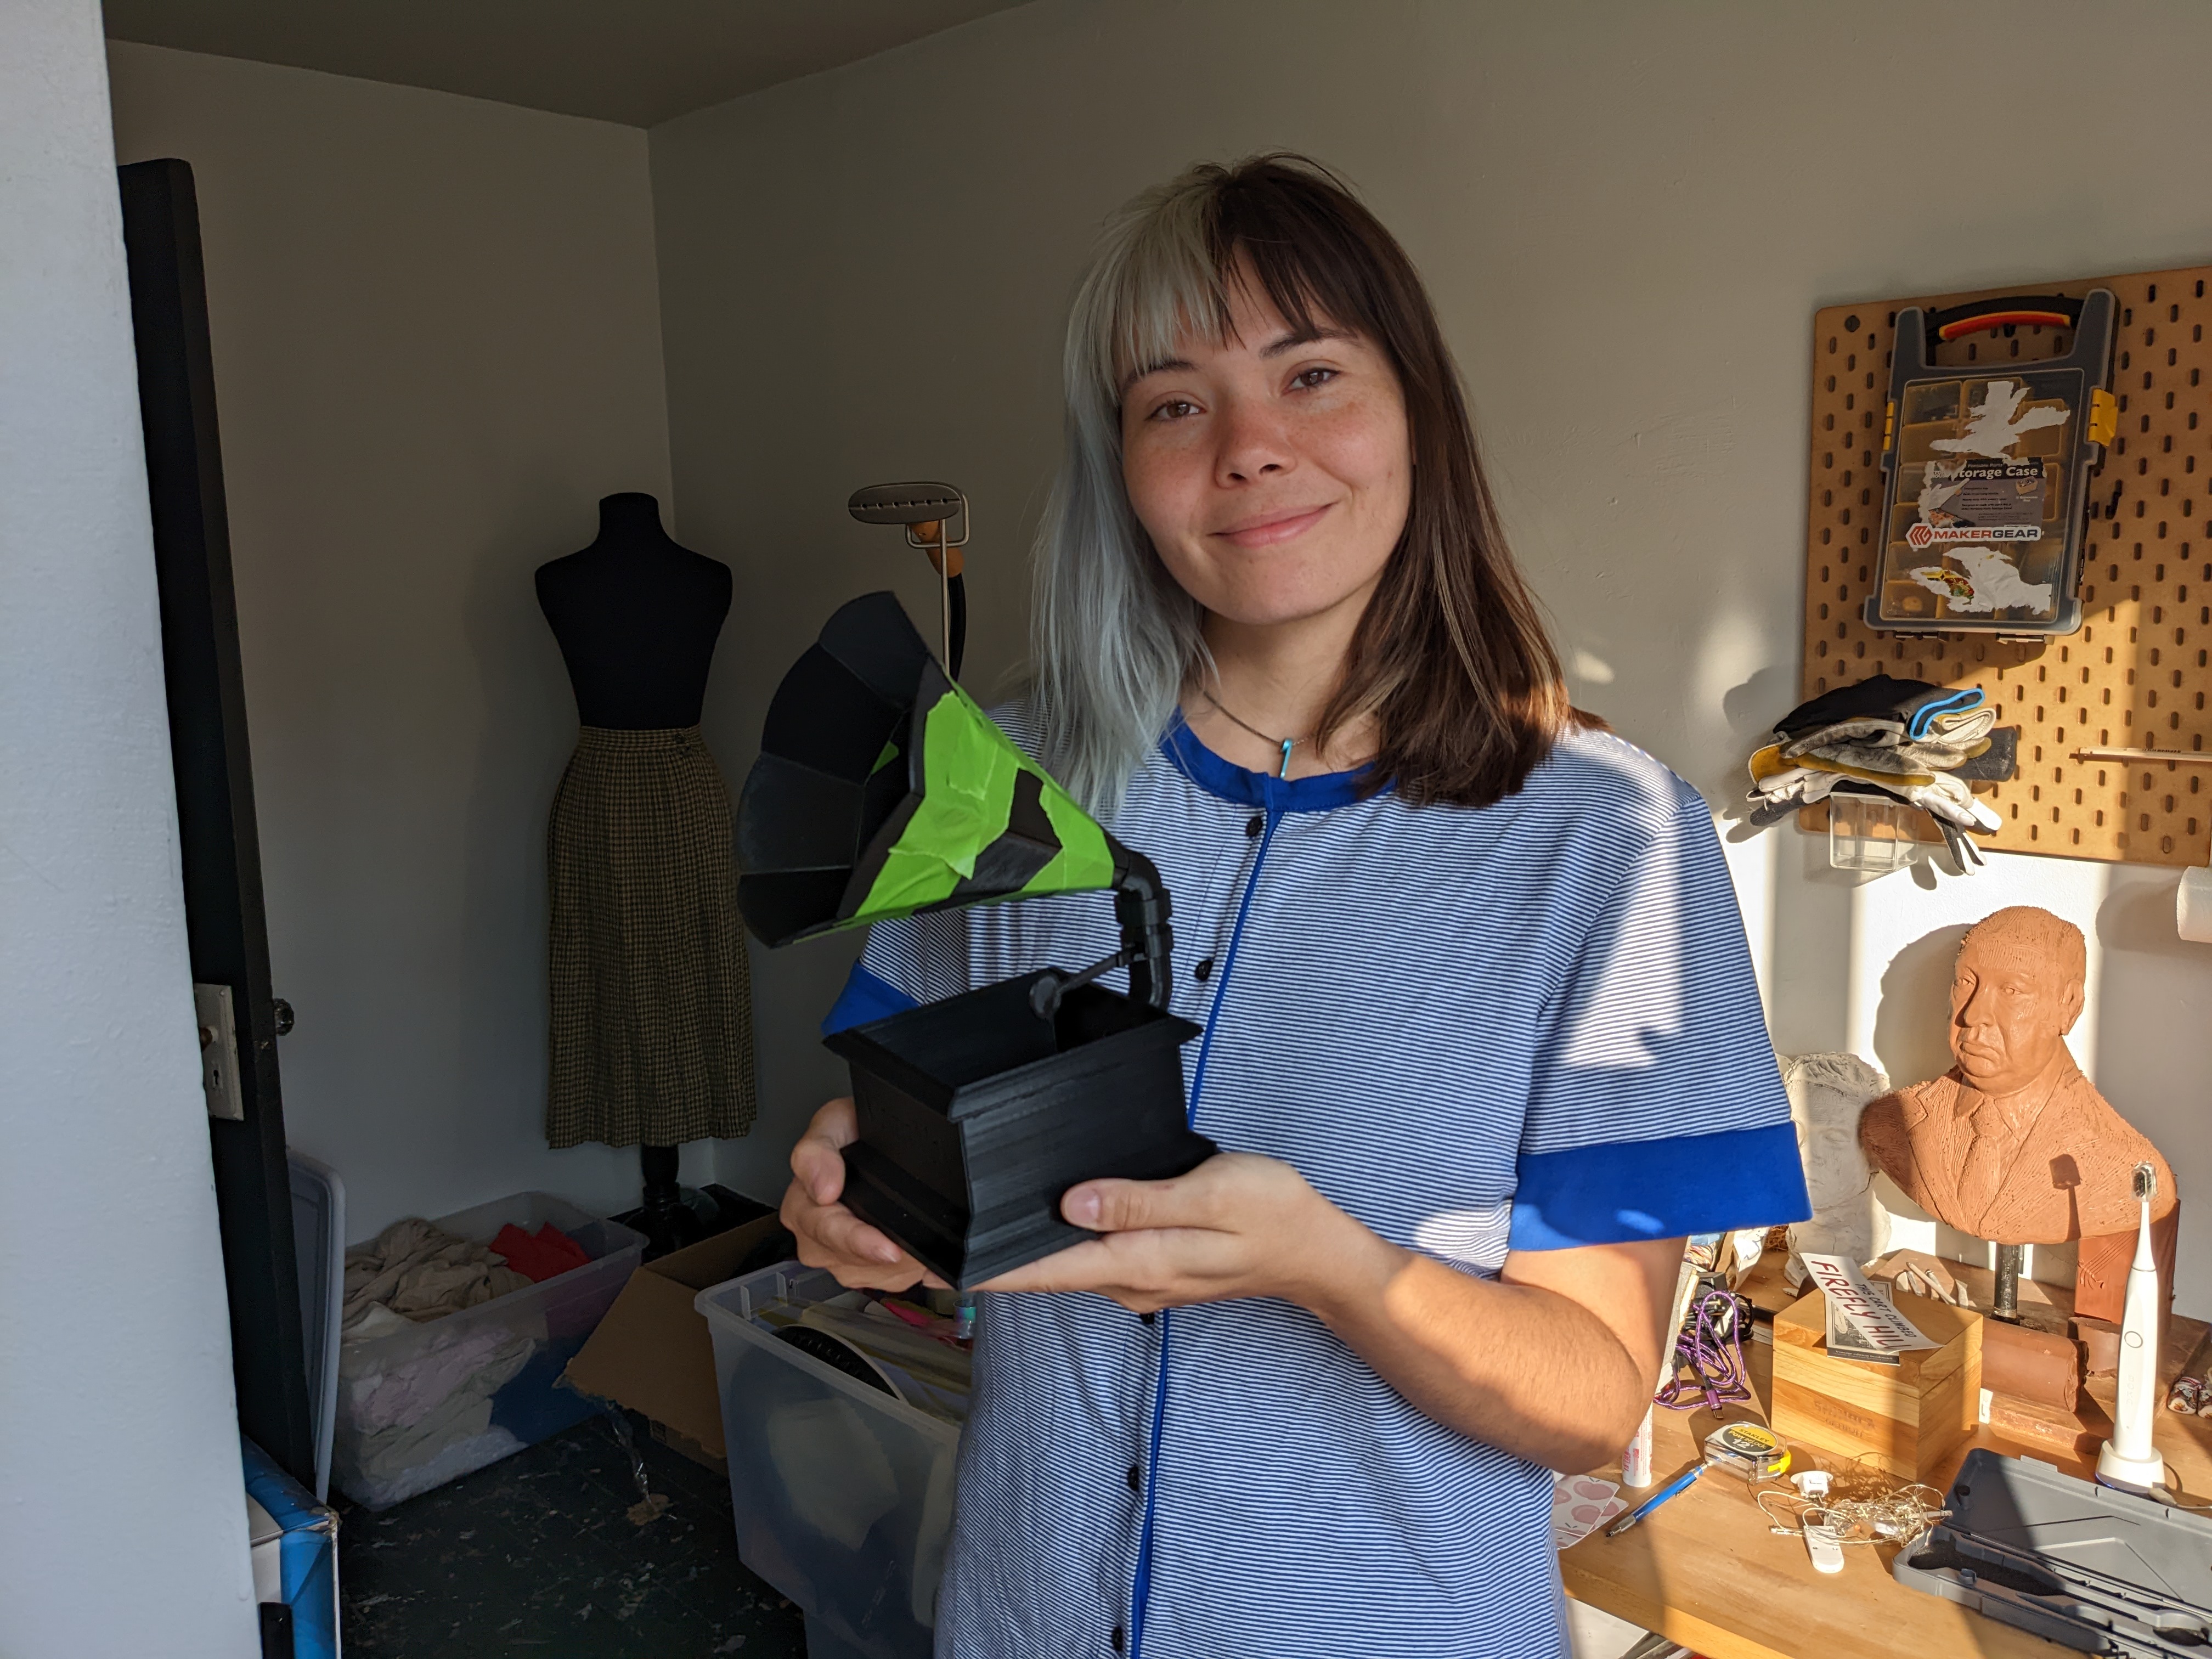
Assembly
Everything had arrived, parts were printed, it was time to put it together!
Easily the hardest part about assembly was soldering together the horn. We plated the edges of the PCBs and removed the soldermask a couple millimeters from the edge so that there was copper all along the edge, similar to stained glass. However, the huge mass of copper proved pretty difficult to heat up, so it took quite a bit of effort to get good solid joints.
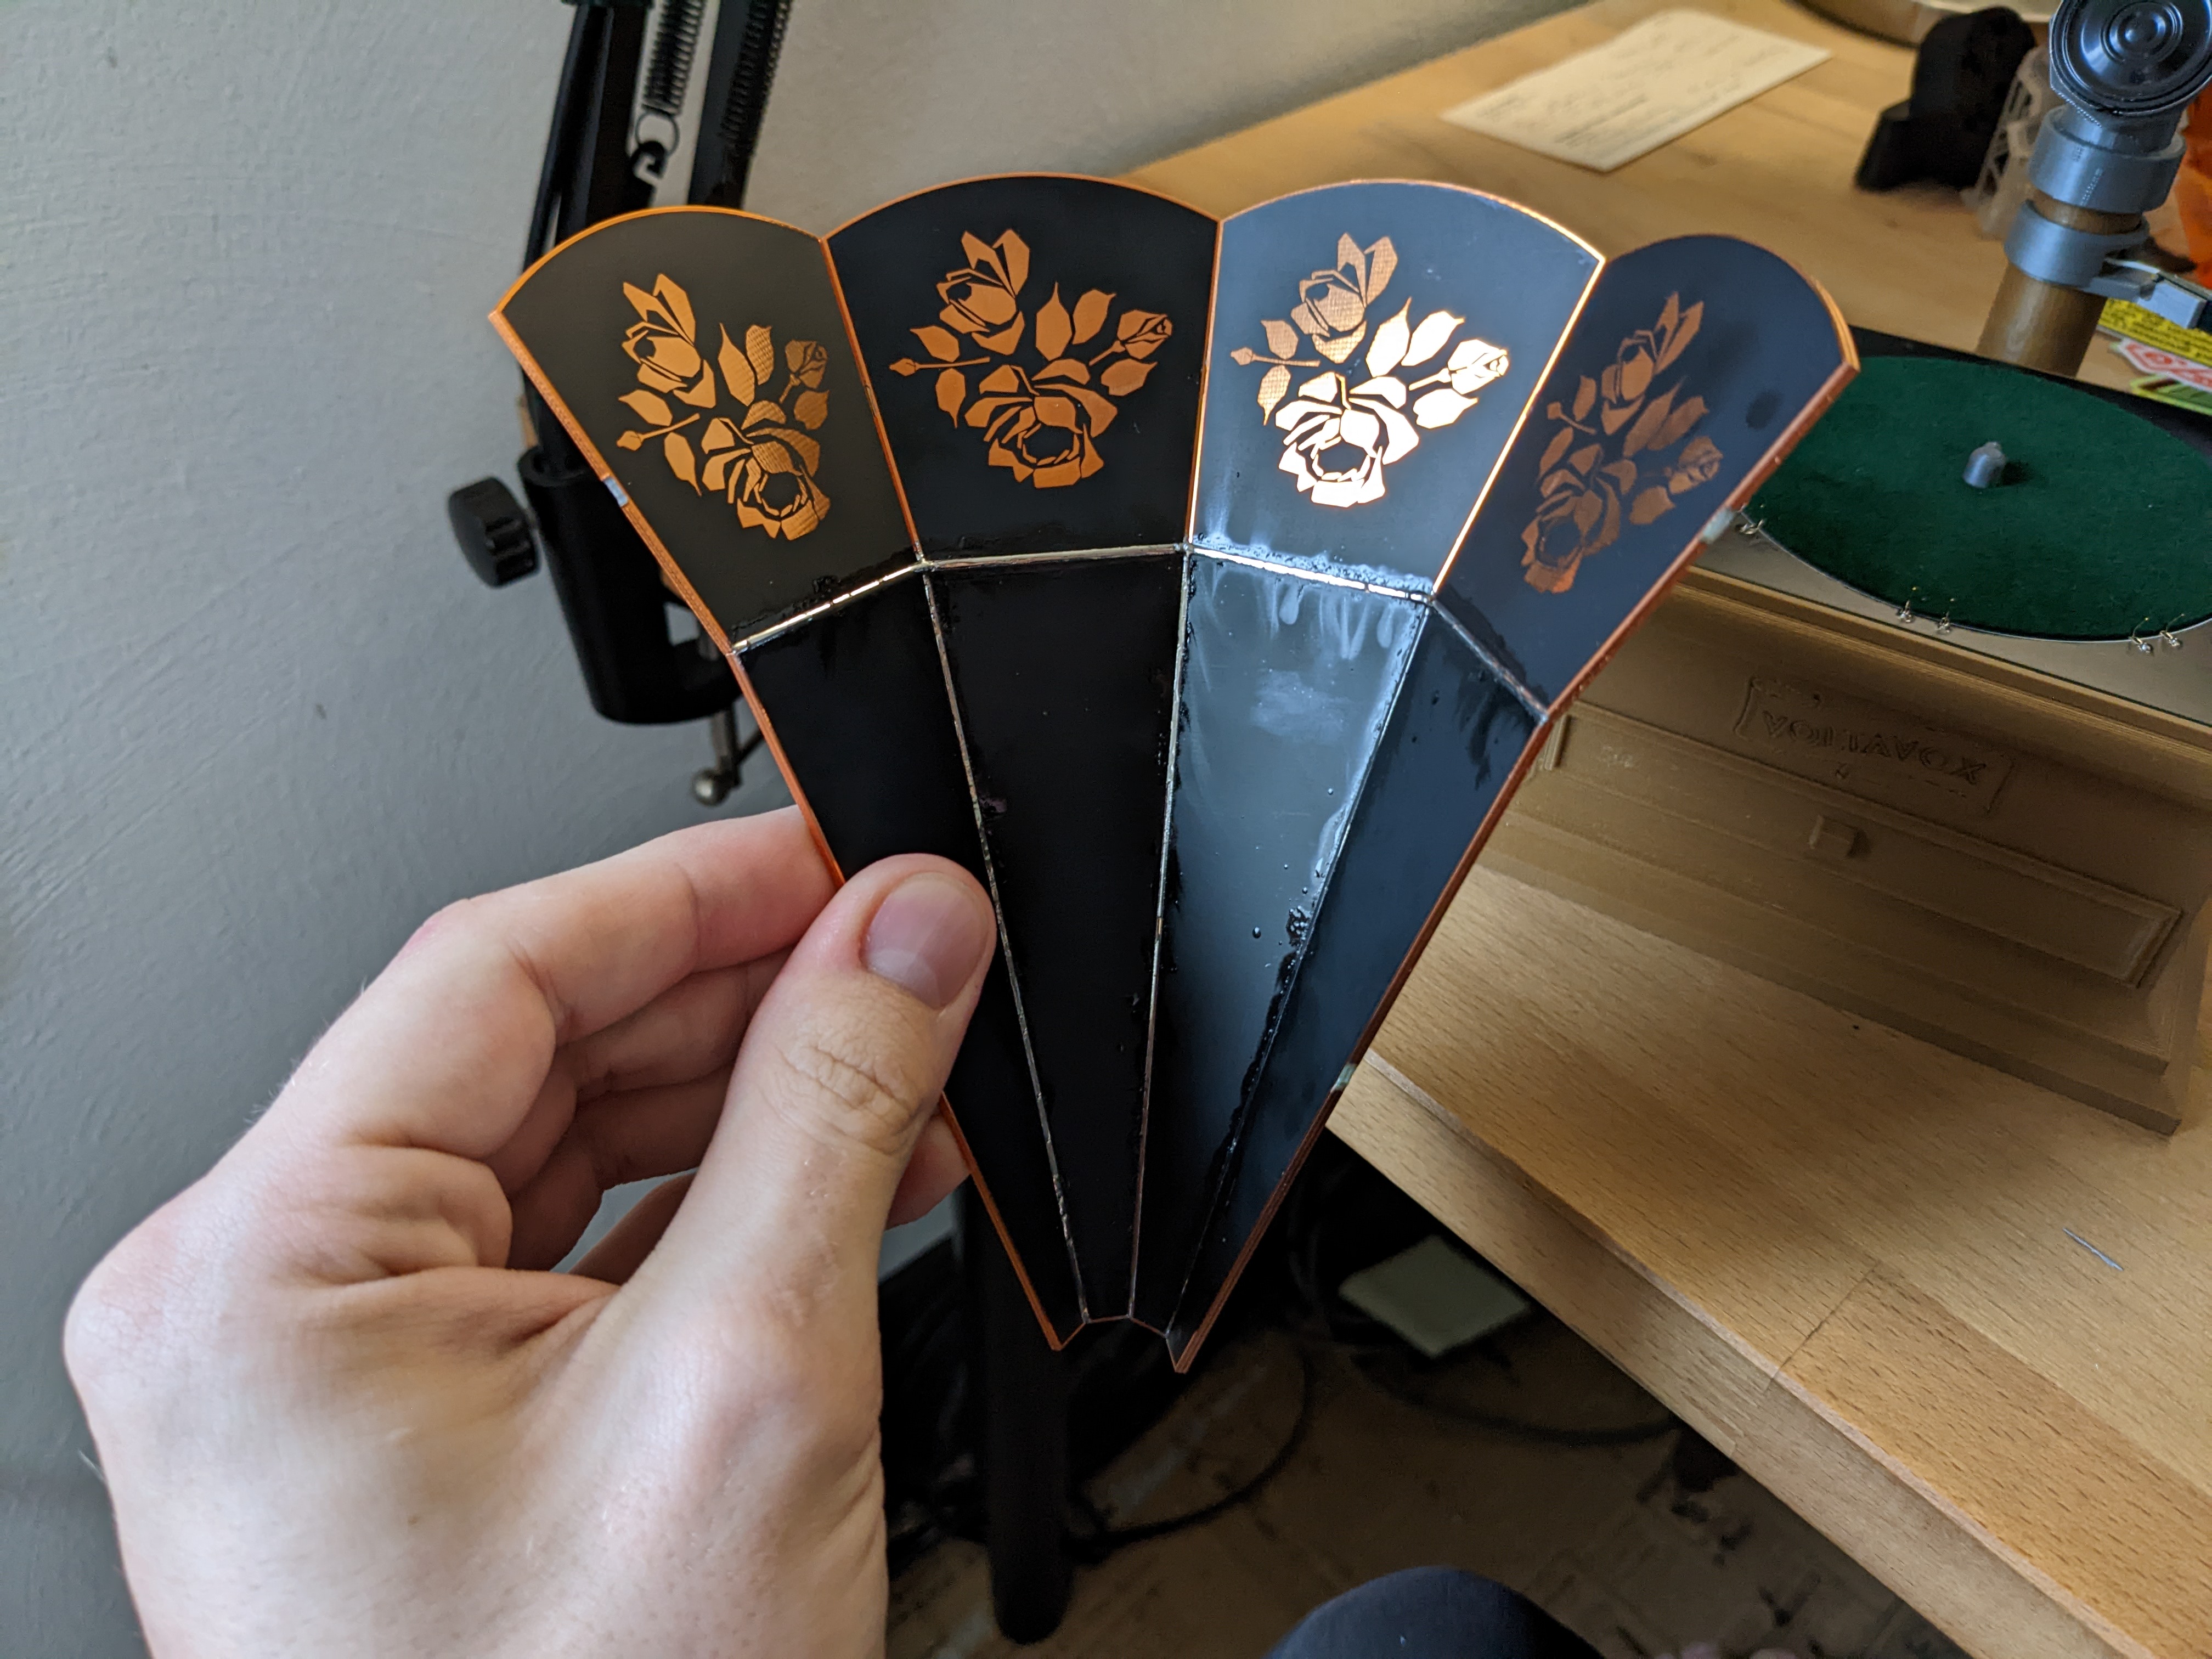 I designed a jig to hold the panels together at the correct angle for soldering, which helped tremendously
Then was the base. All the brown parts are printed in a wood-fill PLA filament. The base has a Voltavox logo I designed inlaid into the print, and an integrated drawer to hold a small record collection.
Most of the soldering was required on the turntable PCB. I mounted the SMT headers for attaching the Adafruit sound board and the battery manager.
I also tacked on a wire to snake up through the neck of the gramophone to the needle PCB. A pogo pin soldered onto the tip of the needle PCB touches the pad on the record, sending a signal to the sound effect board to play a certain file.
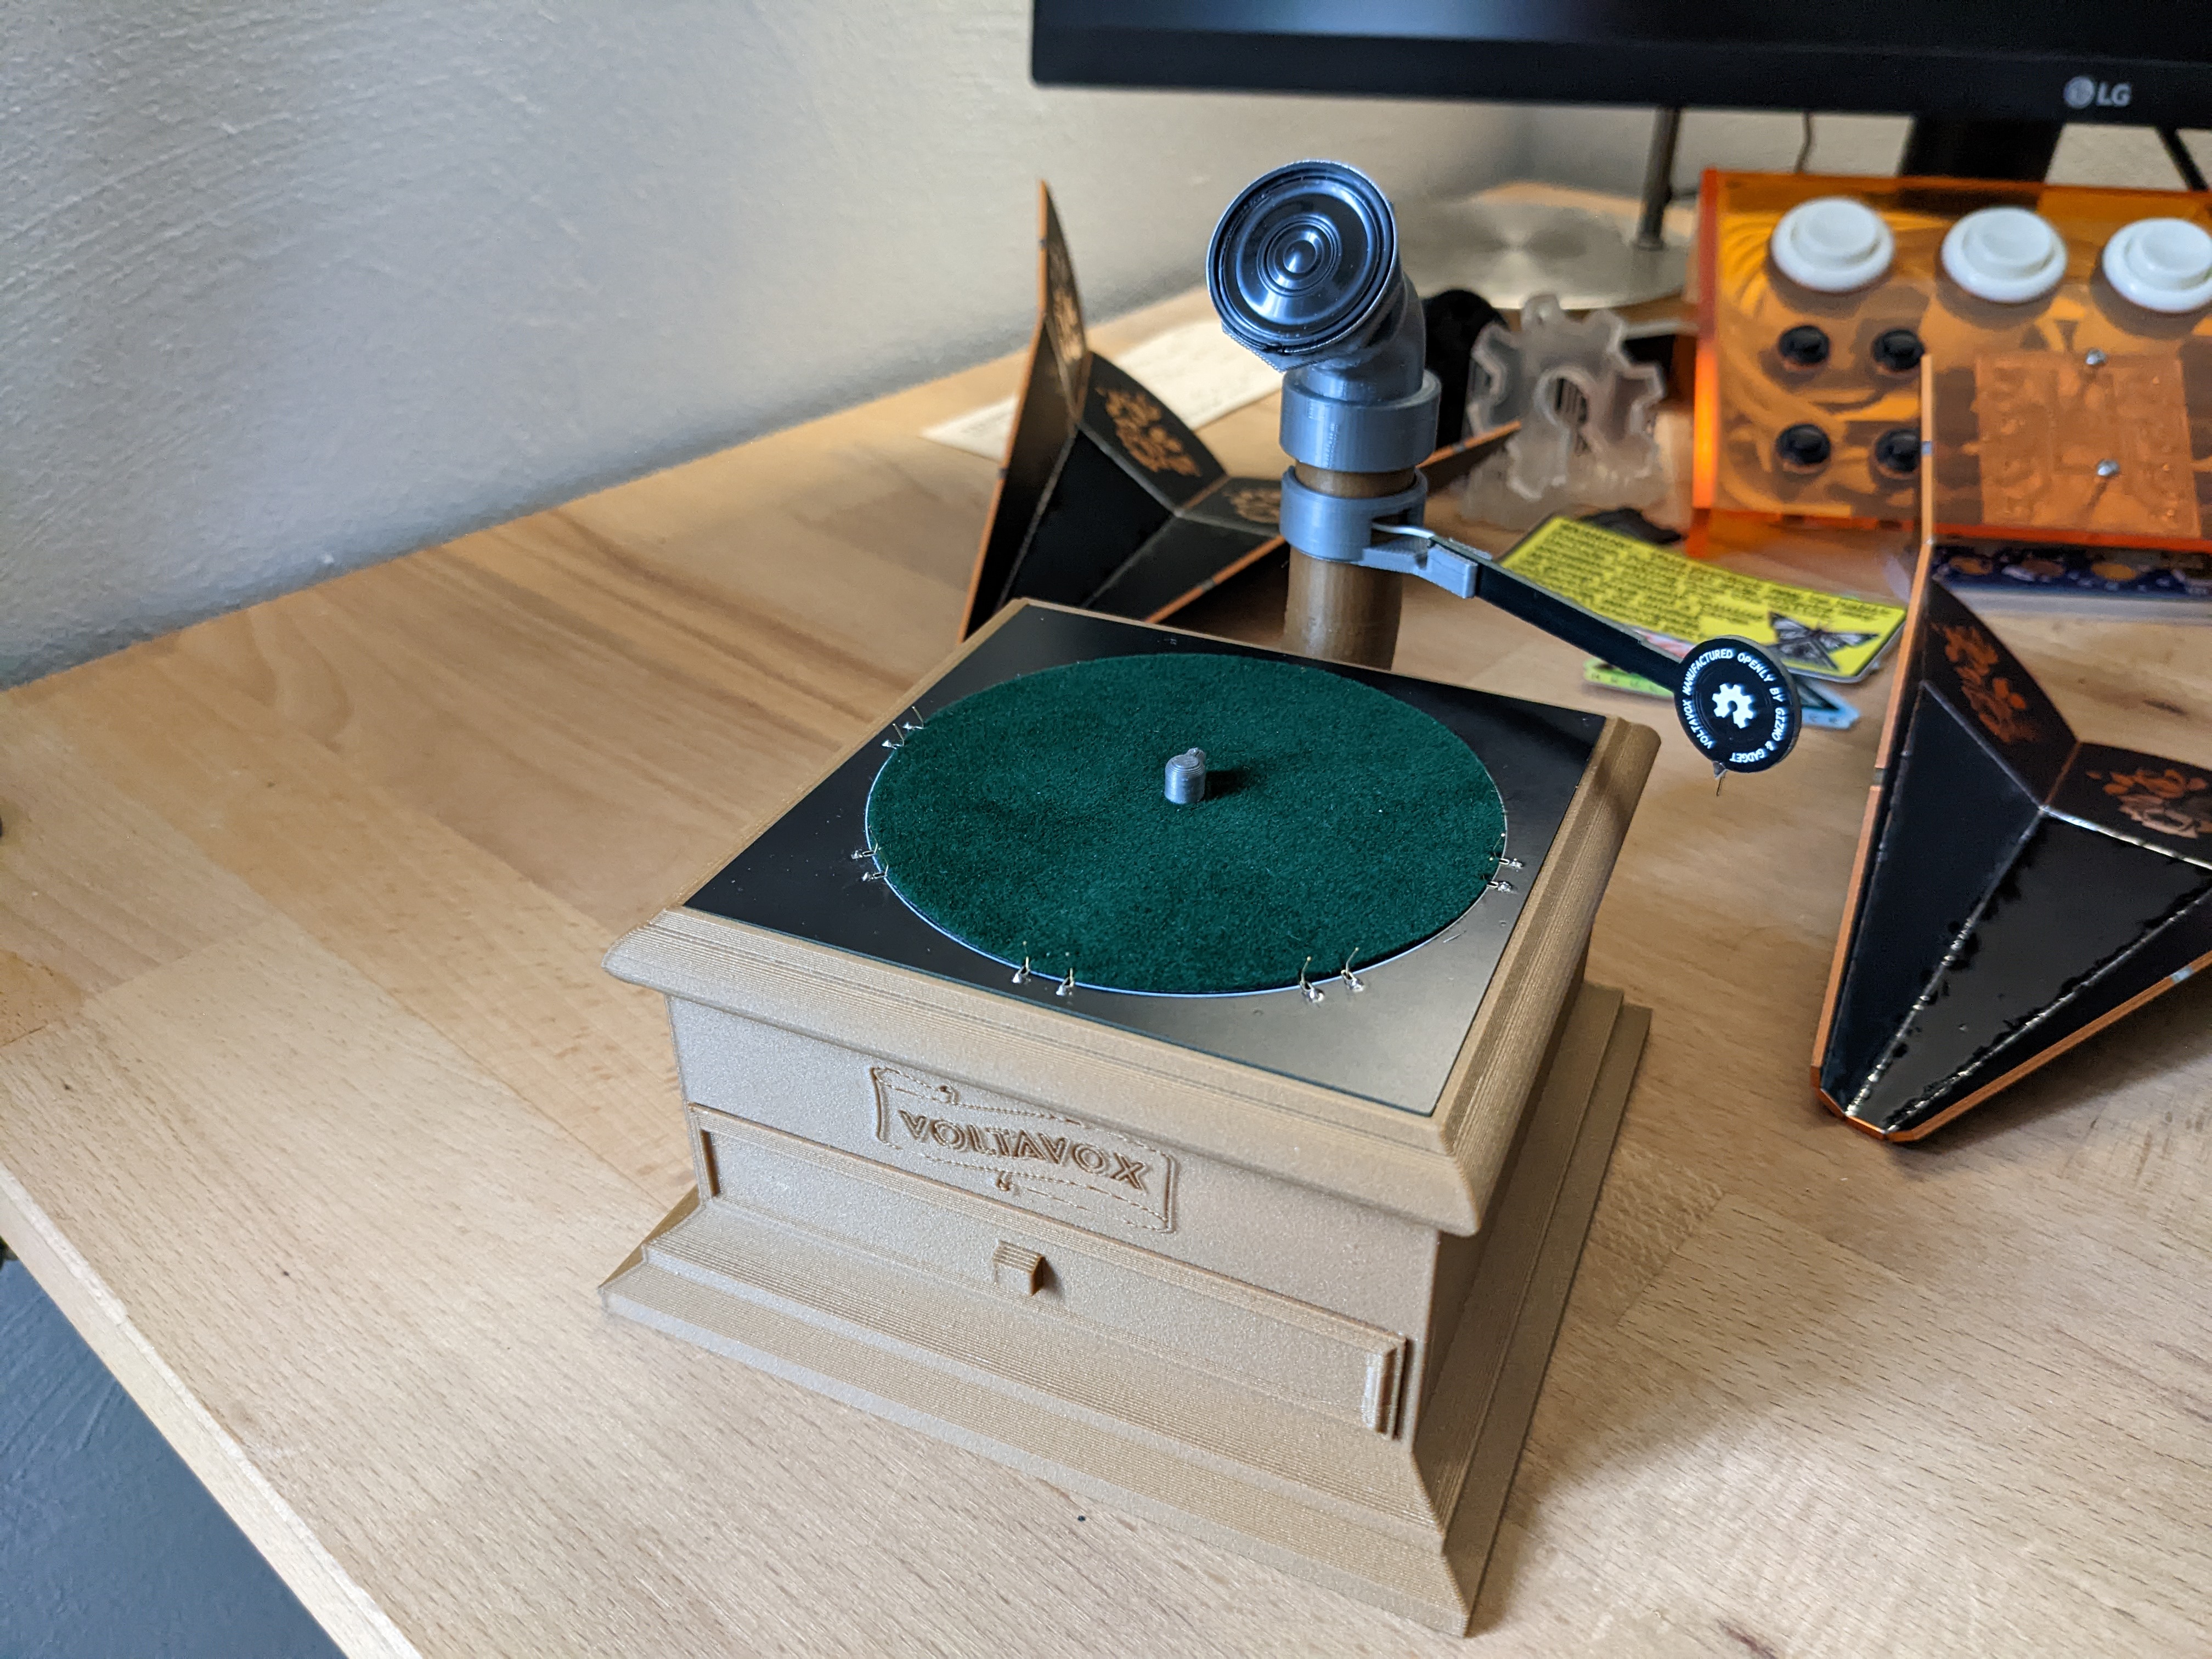 Completed base without the horn attached
I glued a speaker to the print at the base of the horn, and attached it to the sound effect board as well. I also cut out and adhered a thin green felt to the turntable under where the record would sit, to simulate the look of a real phonograph.
The last step was the tricky task of soldering the two halves of the horn together while being clamped onto the horn base print.
Complete
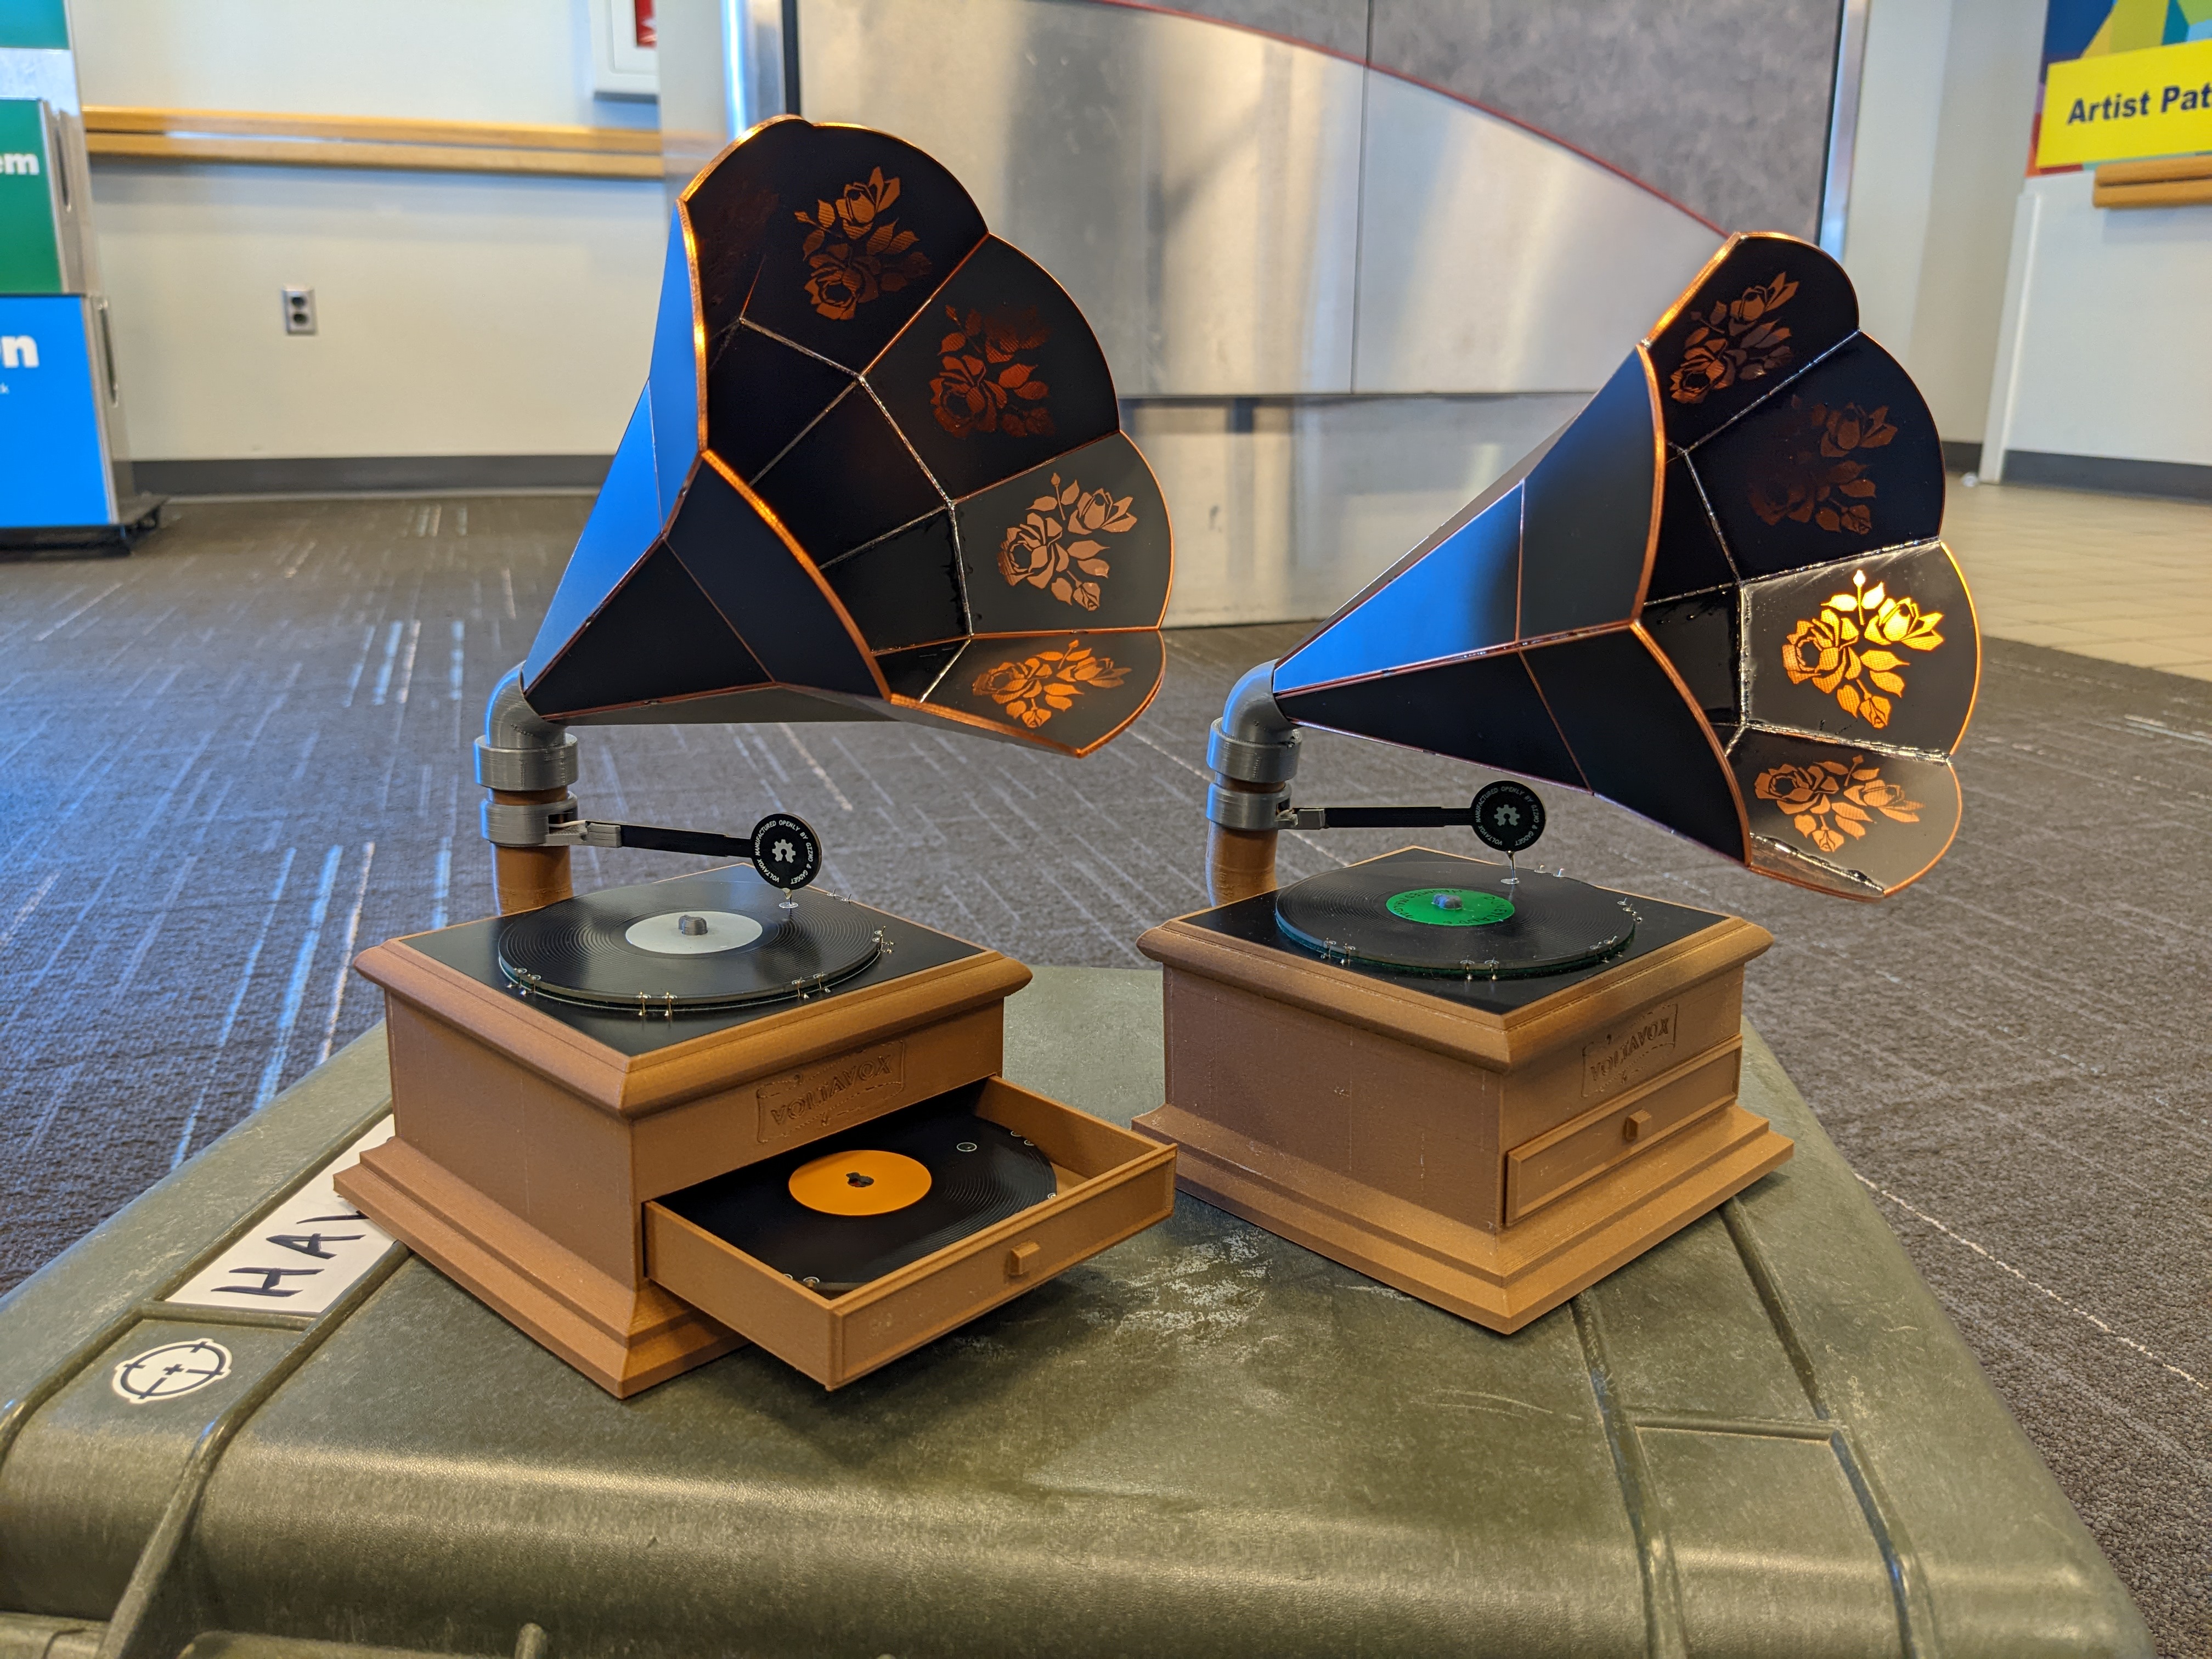
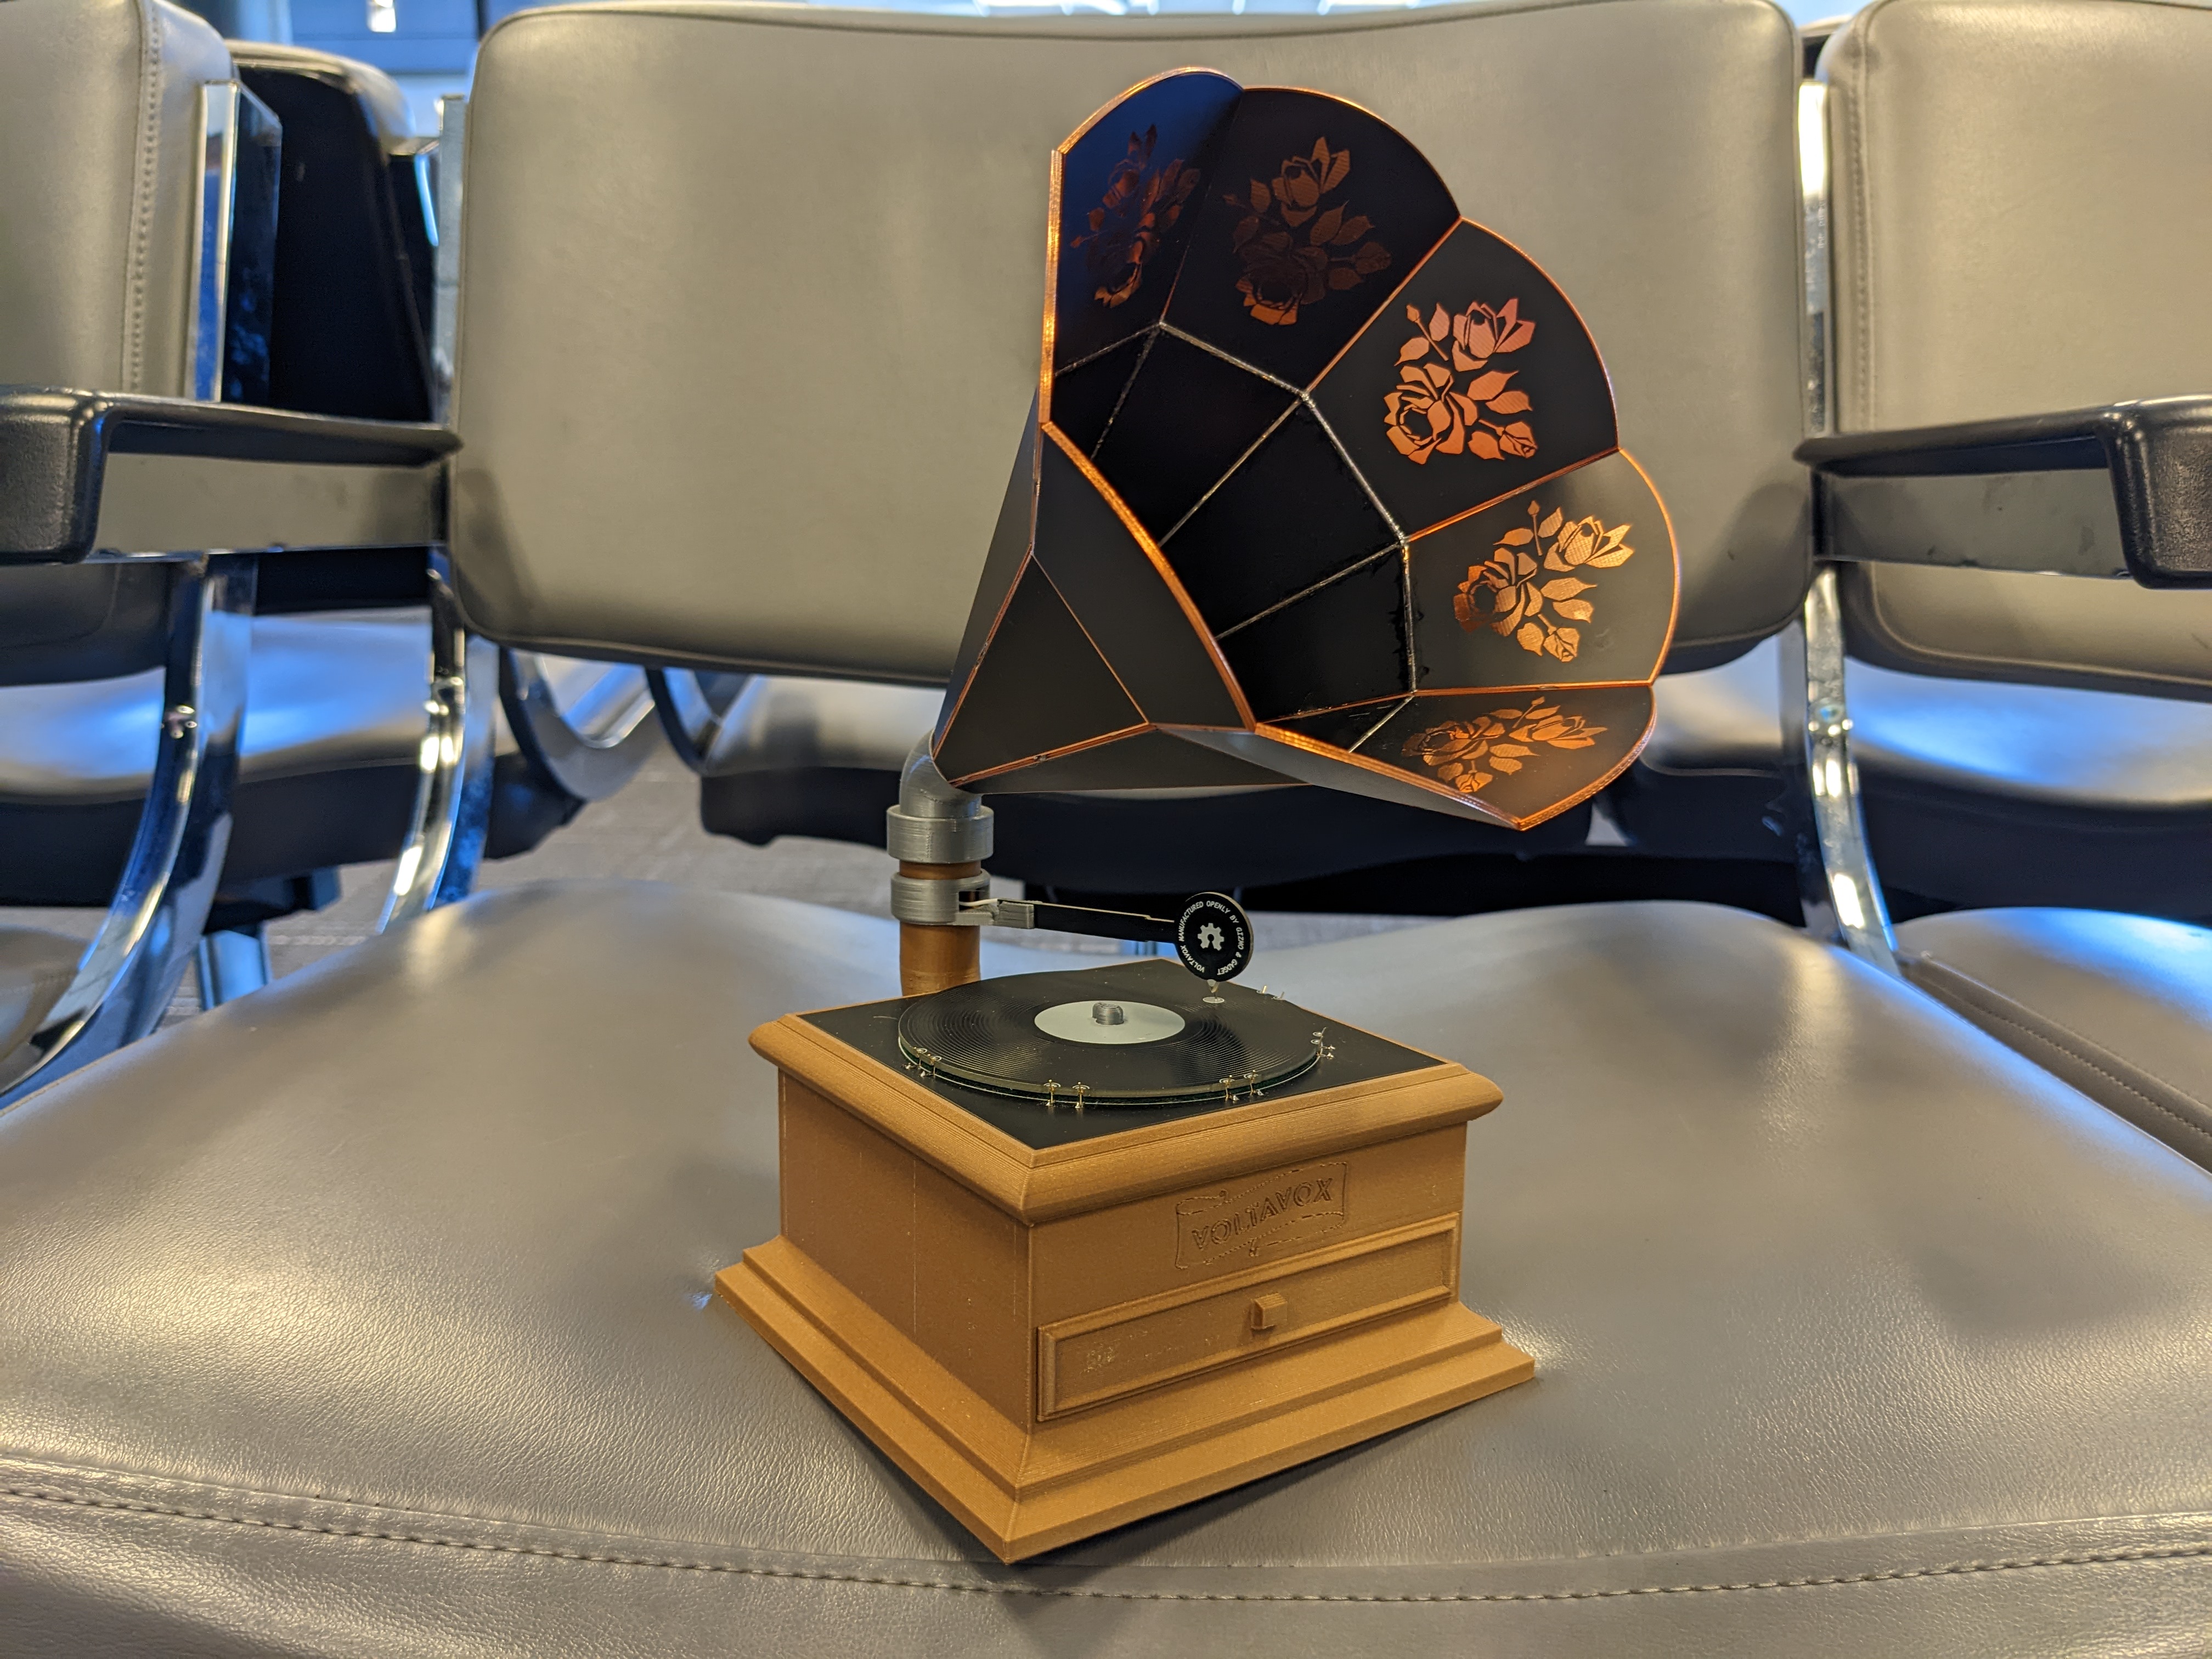
And there it is, a PCB-based skeuomorphism of a phonograph!
 Shortly after completion
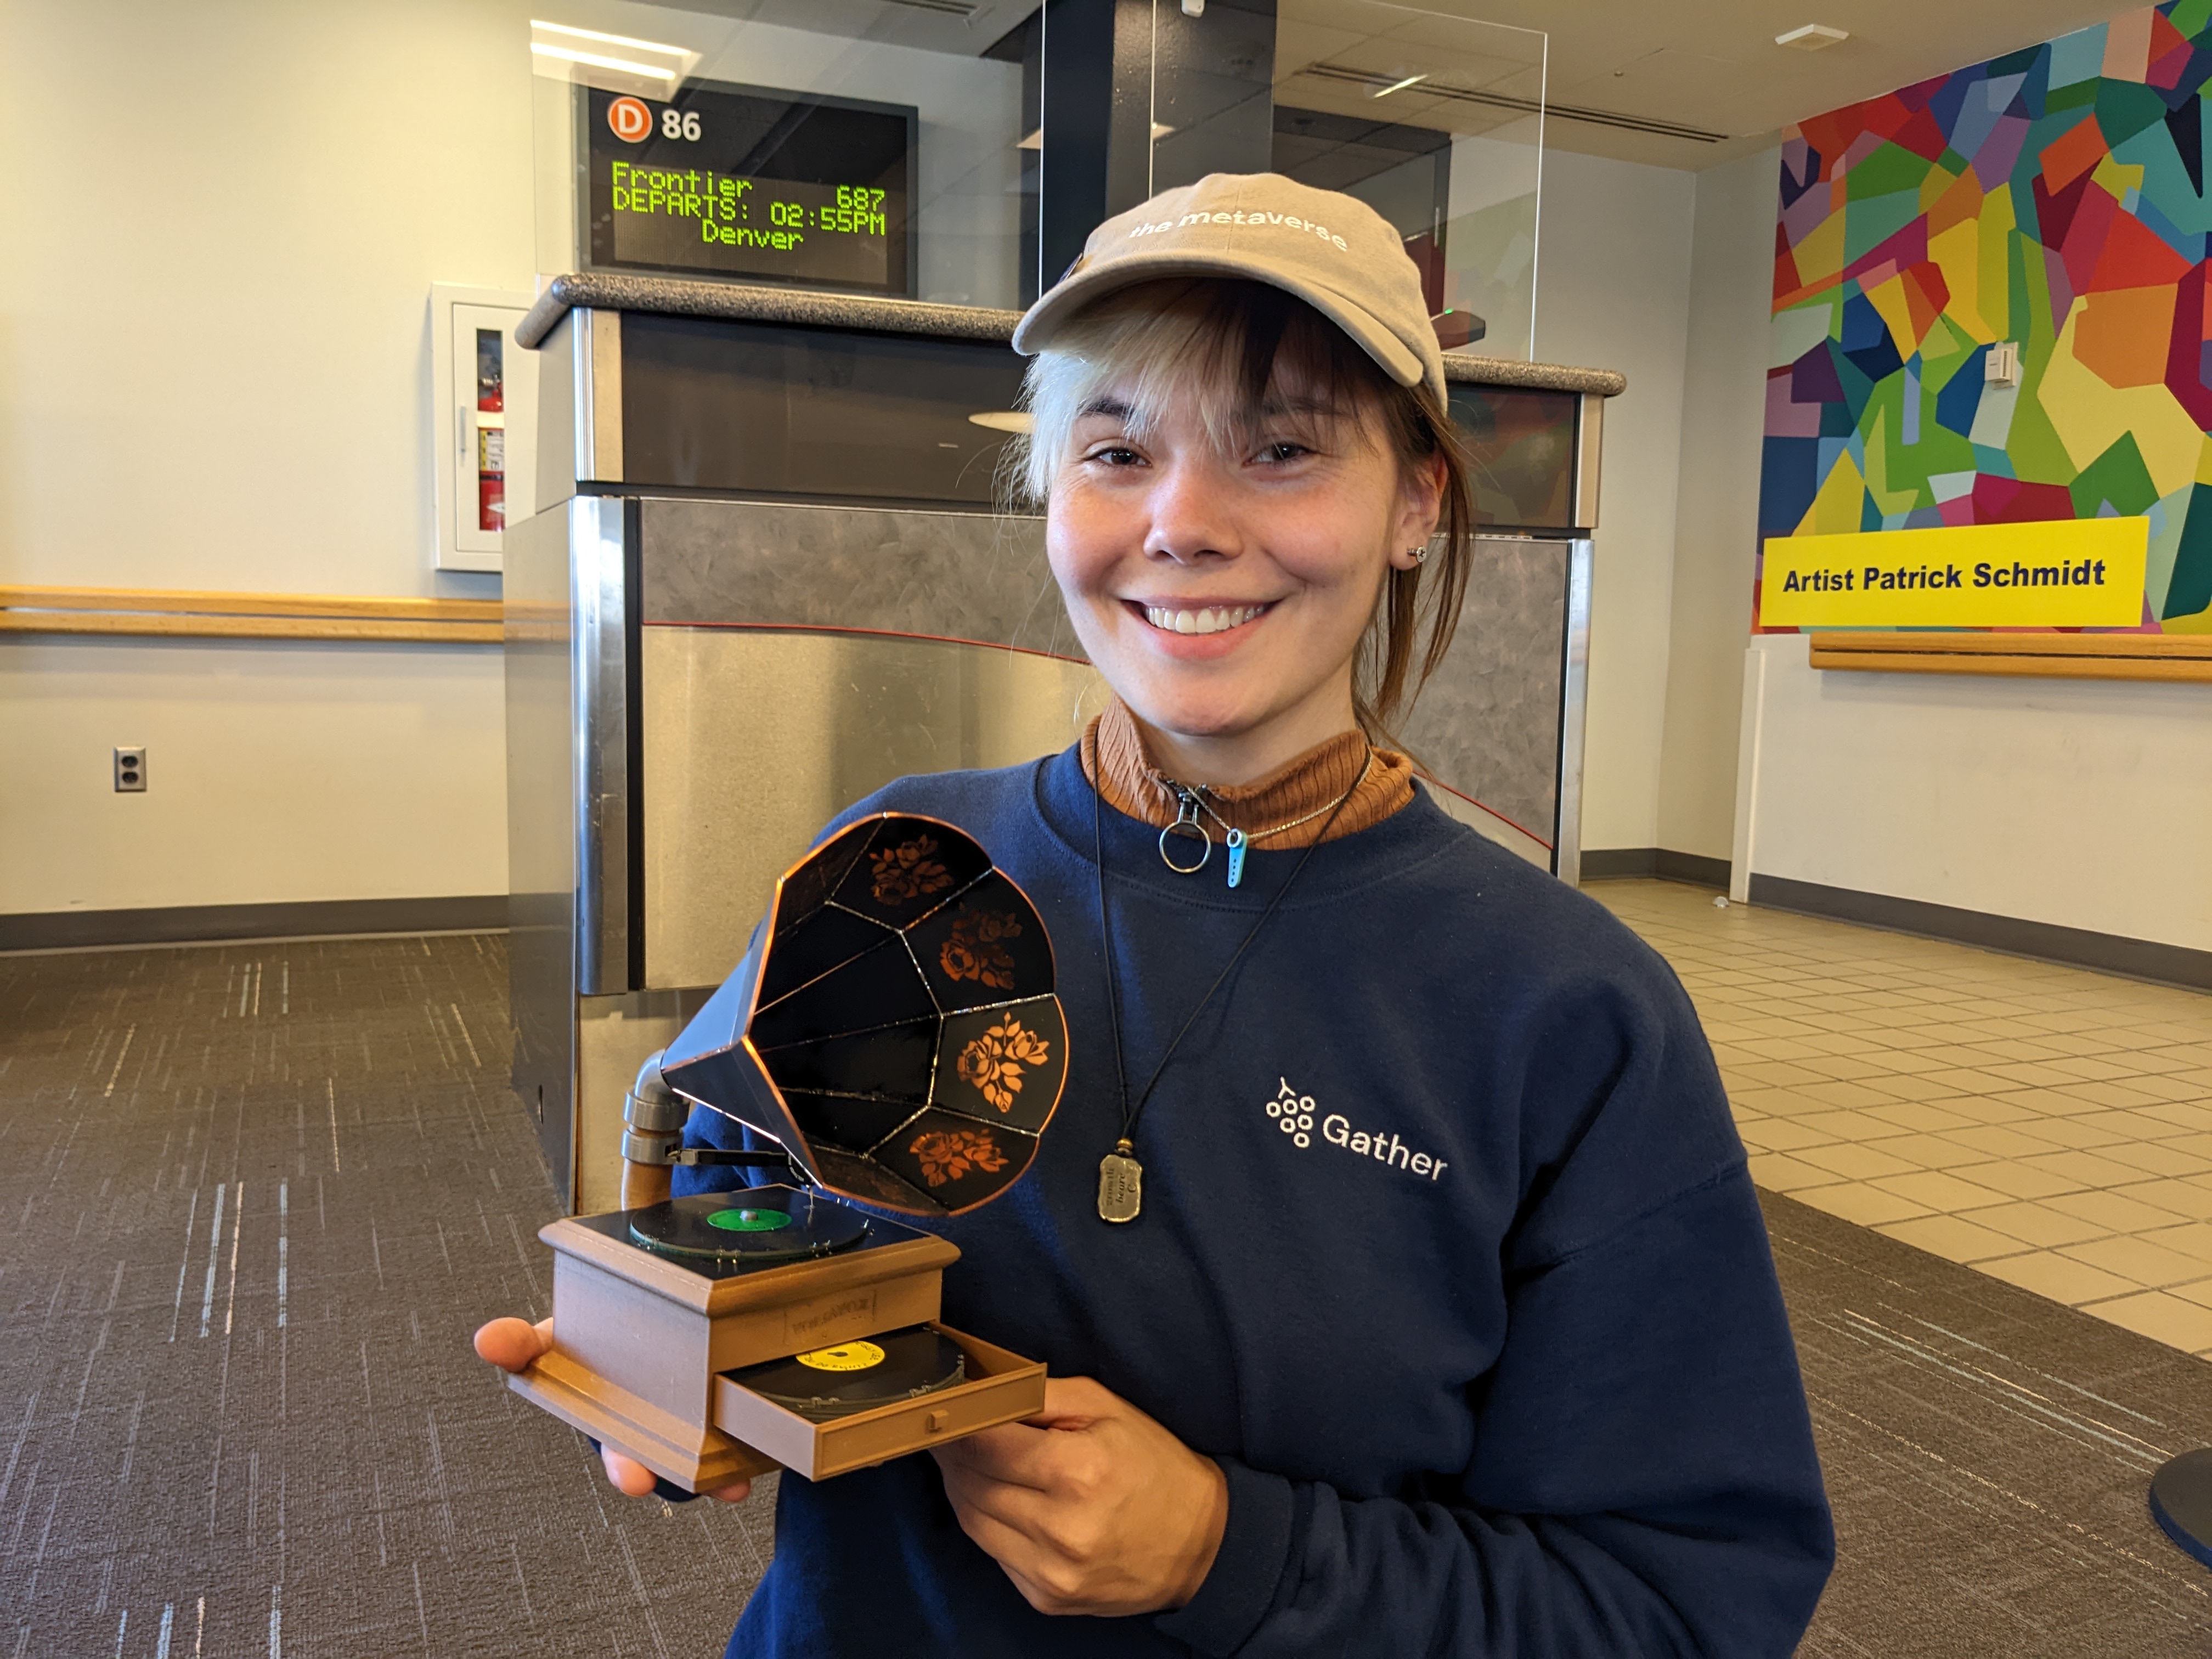 On the way to Colorado for the Denver Immersive Gathering
You can find all the source files for Voltavox in this GitHub repo.